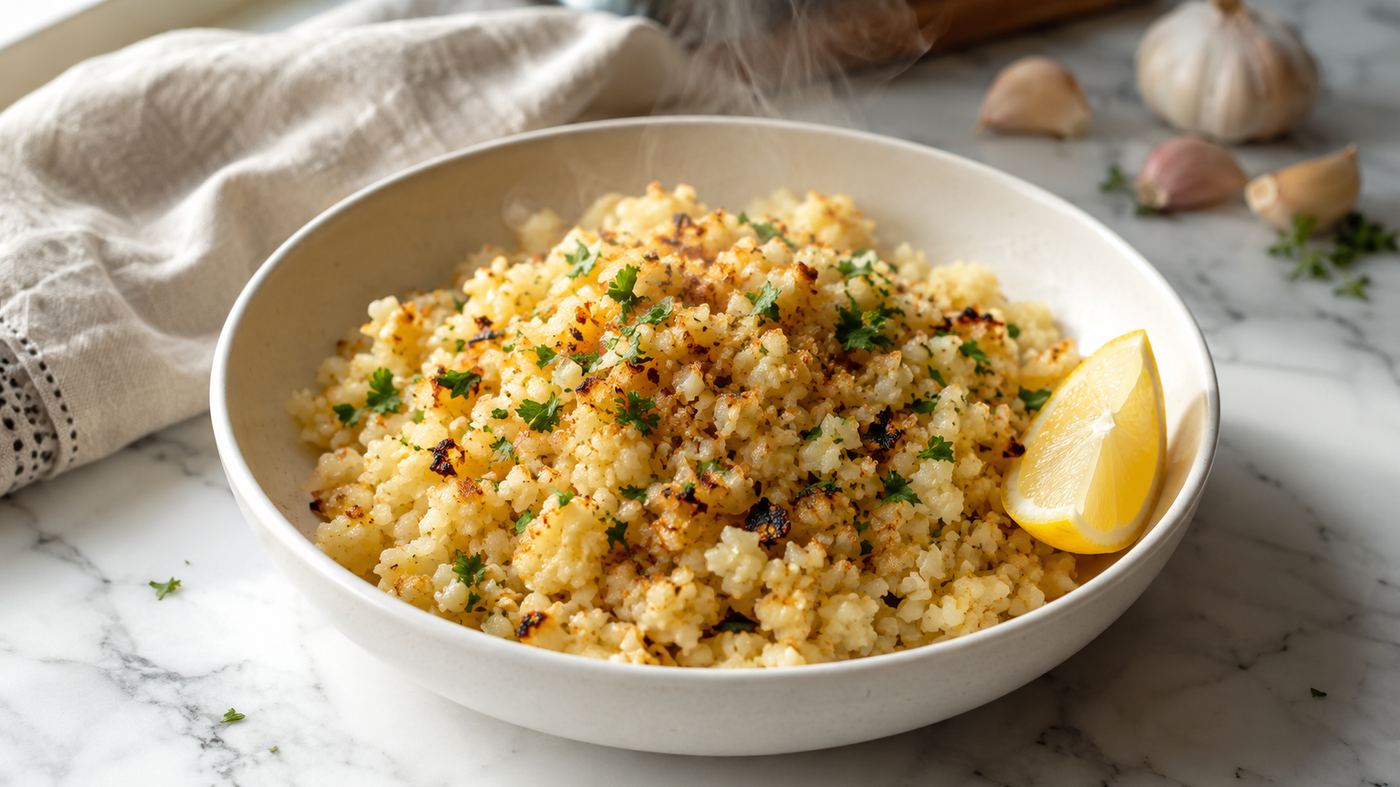
Fluffy, savory, and it hits the spot in a way that feels way more indulgent than it actually is. Ready in 15 minutes, works alongside pretty much anything, and even the kids eat it without complaint.
I’ll be honest — I was skeptical about cauliflower rice for a long time. Seemed like one of those things that sounds good but never really satisfies, you know? Then I made it with garlic butter and a little seasoning and genuinely couldn’t believe how good it was. Fluffy, savory, and it hits the spot in a way that feels way more indulgent than it actually is.
This cauliflower rice recipe has become my go-to on busy weeknights when I want something light but filling. It comes together in under 15 minutes, uses ingredients I almost always have on hand, and works alongside pretty much anything. Chicken, salmon, stir-fry, eggs — it just fits.
It’s also one of those recipes that works whether you’re eating low-carb, keto, gluten-free, or just trying to sneak more veggies into your week. No complicated steps, no special equipment. Just a pan, some garlic, butter, and a head of cauliflower.
My kids actually eat this without complaint, which honestly is the highest possible compliment.
Why You’ll Love This Recipe
- Ready in 15 minutes — faster than cooking actual rice
- Light but satisfying — a great low carb rice alternative that doesn’t feel like a compromise
- Minimal ingredients — simple pantry staples, nothing fancy
- Versatile base — works with almost any protein or sauce
- Naturally keto, gluten-free, and vegan-adaptable
- Works with fresh or frozen cauliflower — no excuses not to make it
- Budget-friendly — one head of cauliflower makes 4 servings
Step-by-Step Instructions
-
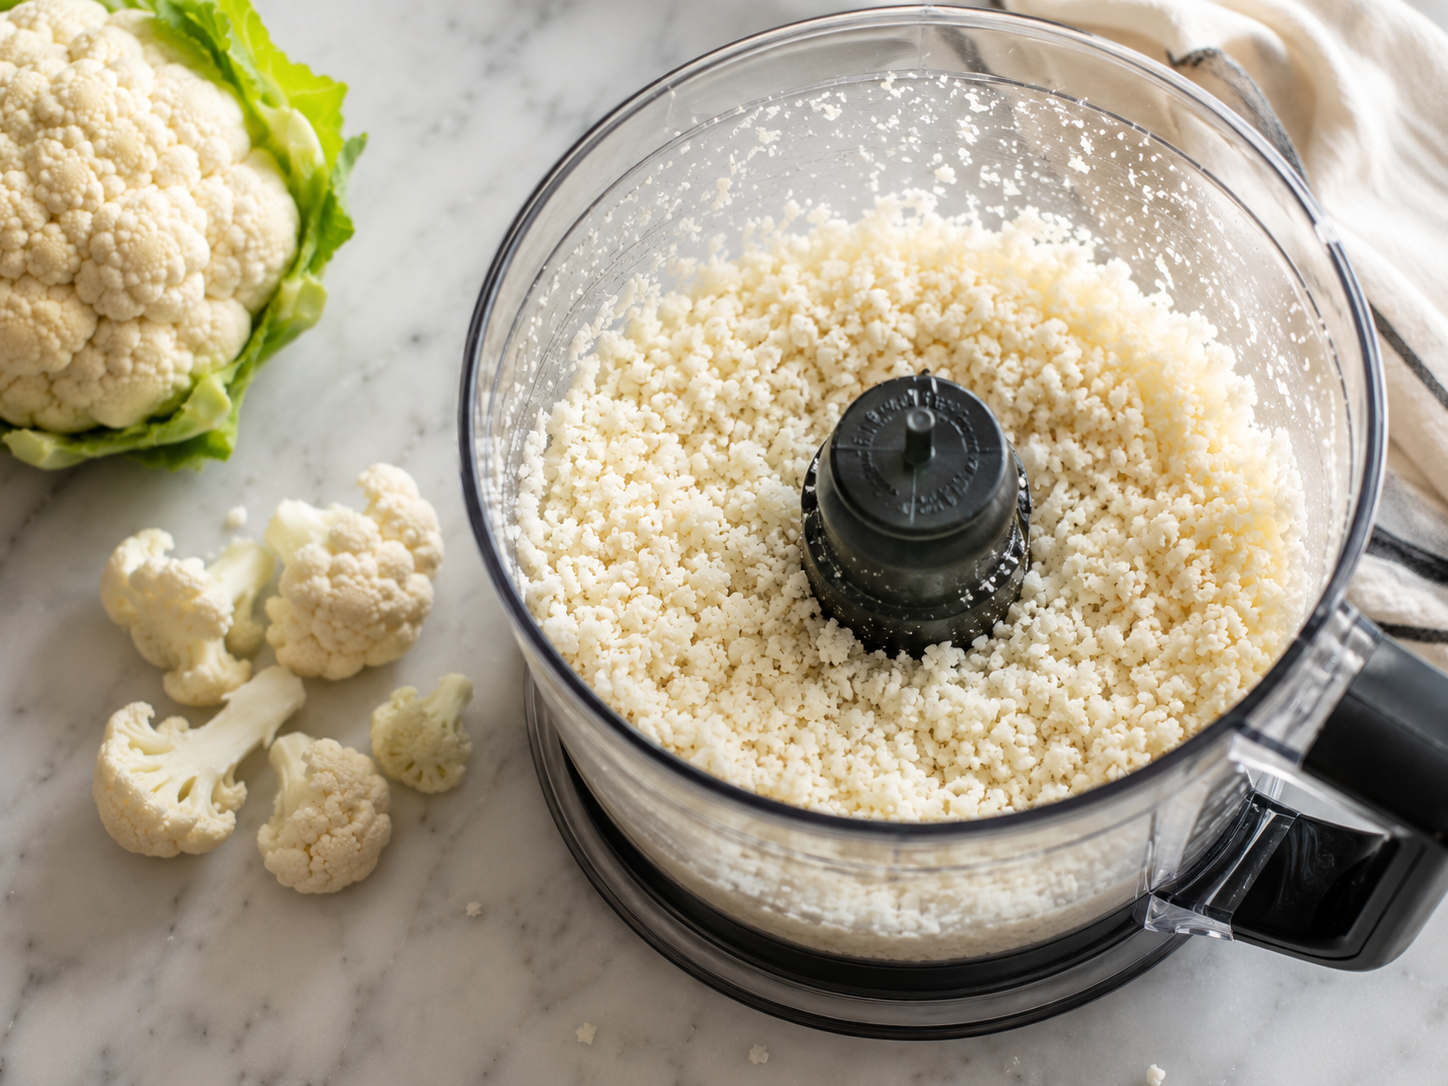
1Prep your cauliflower. If using a whole head, remove the outer leaves and cut into large florets. Working in batches, pulse the florets in a food processor until they resemble rice or couscous — about 8–10 short pulses. Don’t over-process or it’ll turn mushy. You want small, distinct pieces.
-
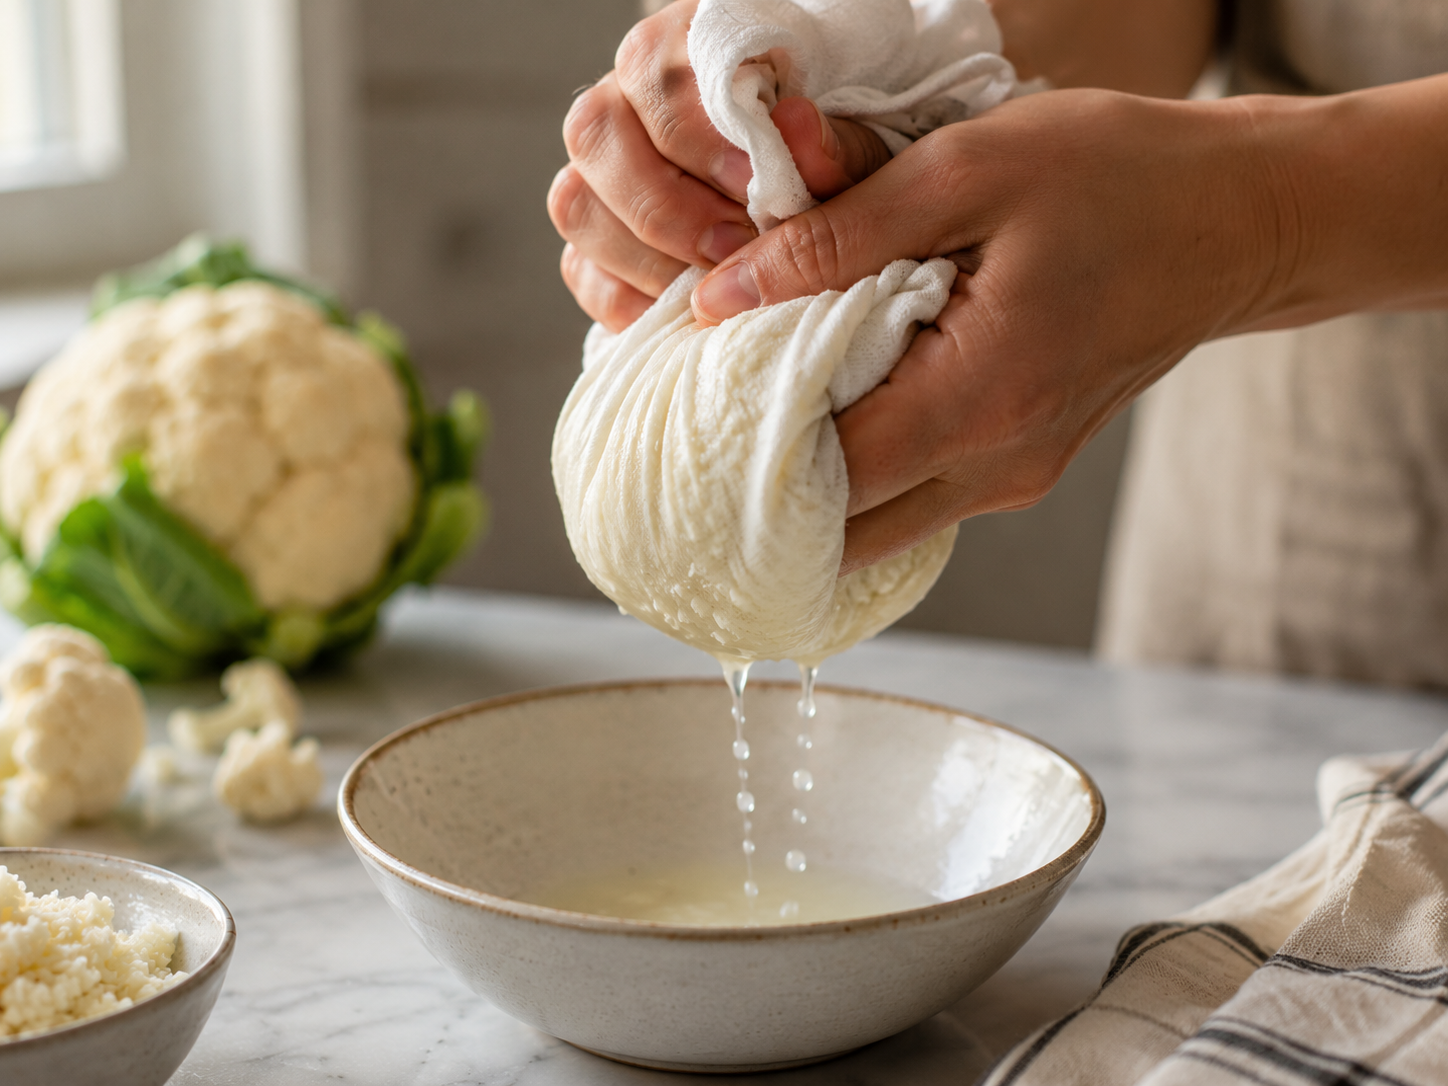
2Remove excess moisture. Transfer the riced cauliflower to a clean kitchen towel or paper towels and gently squeeze out as much water as you can. This step is important — it’s what prevents soggy cauliflower rice.⚠️ Don’t skip this. Extra moisture in the pan = steamed, mushy rice. A good squeeze through a towel makes a real difference in the final texture.
-
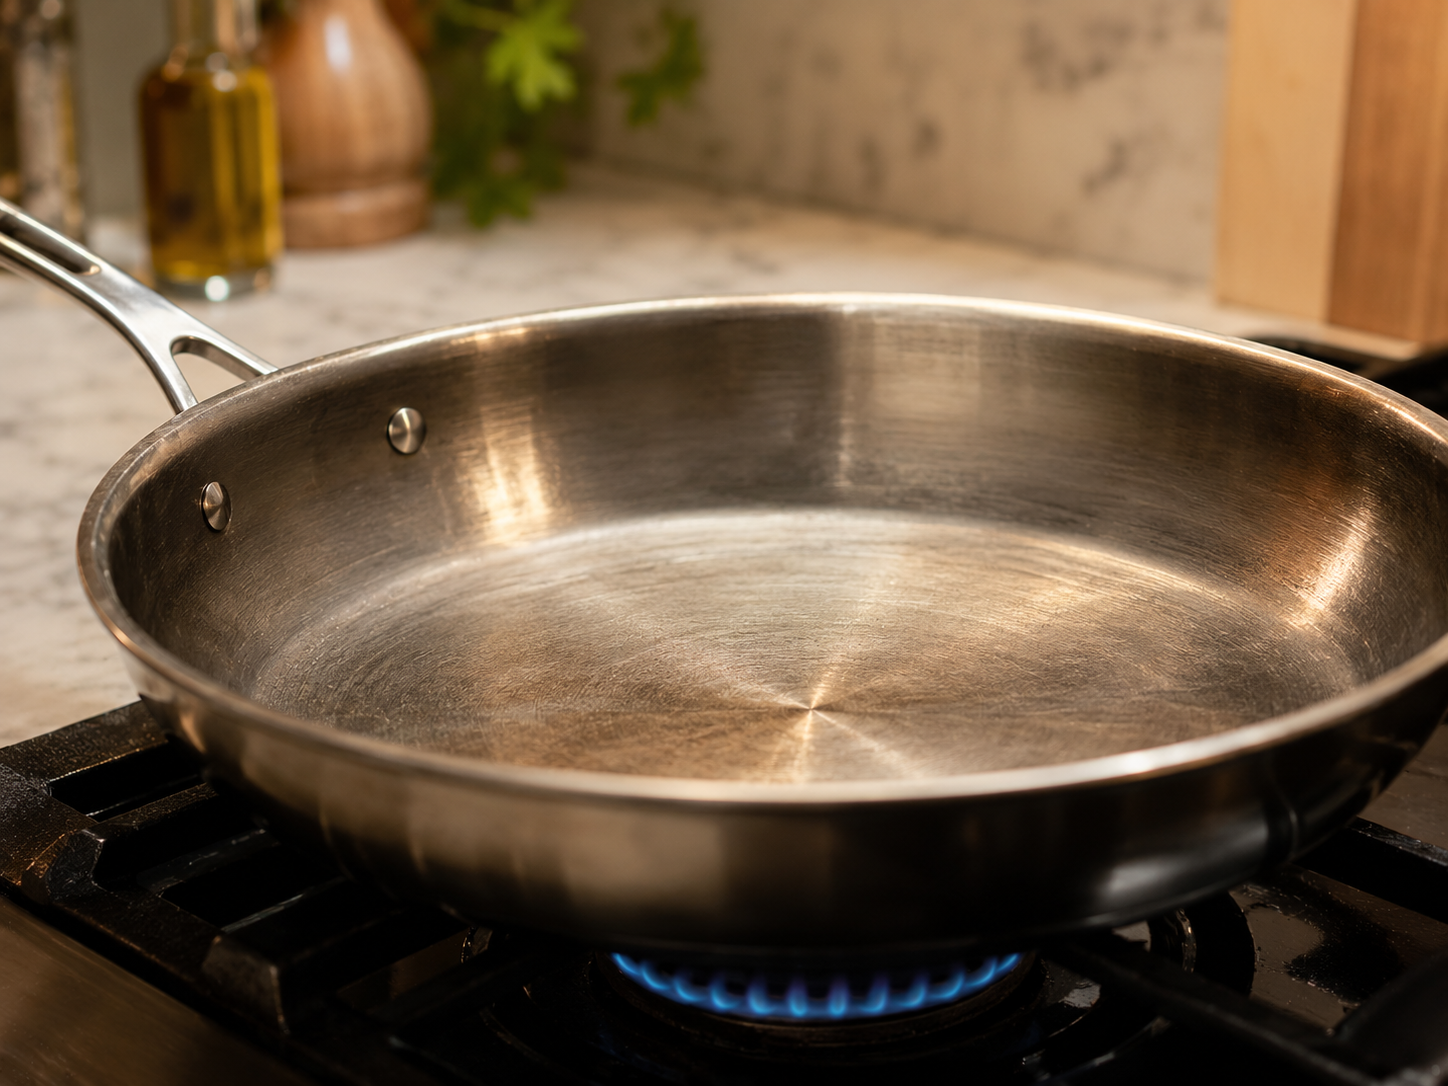
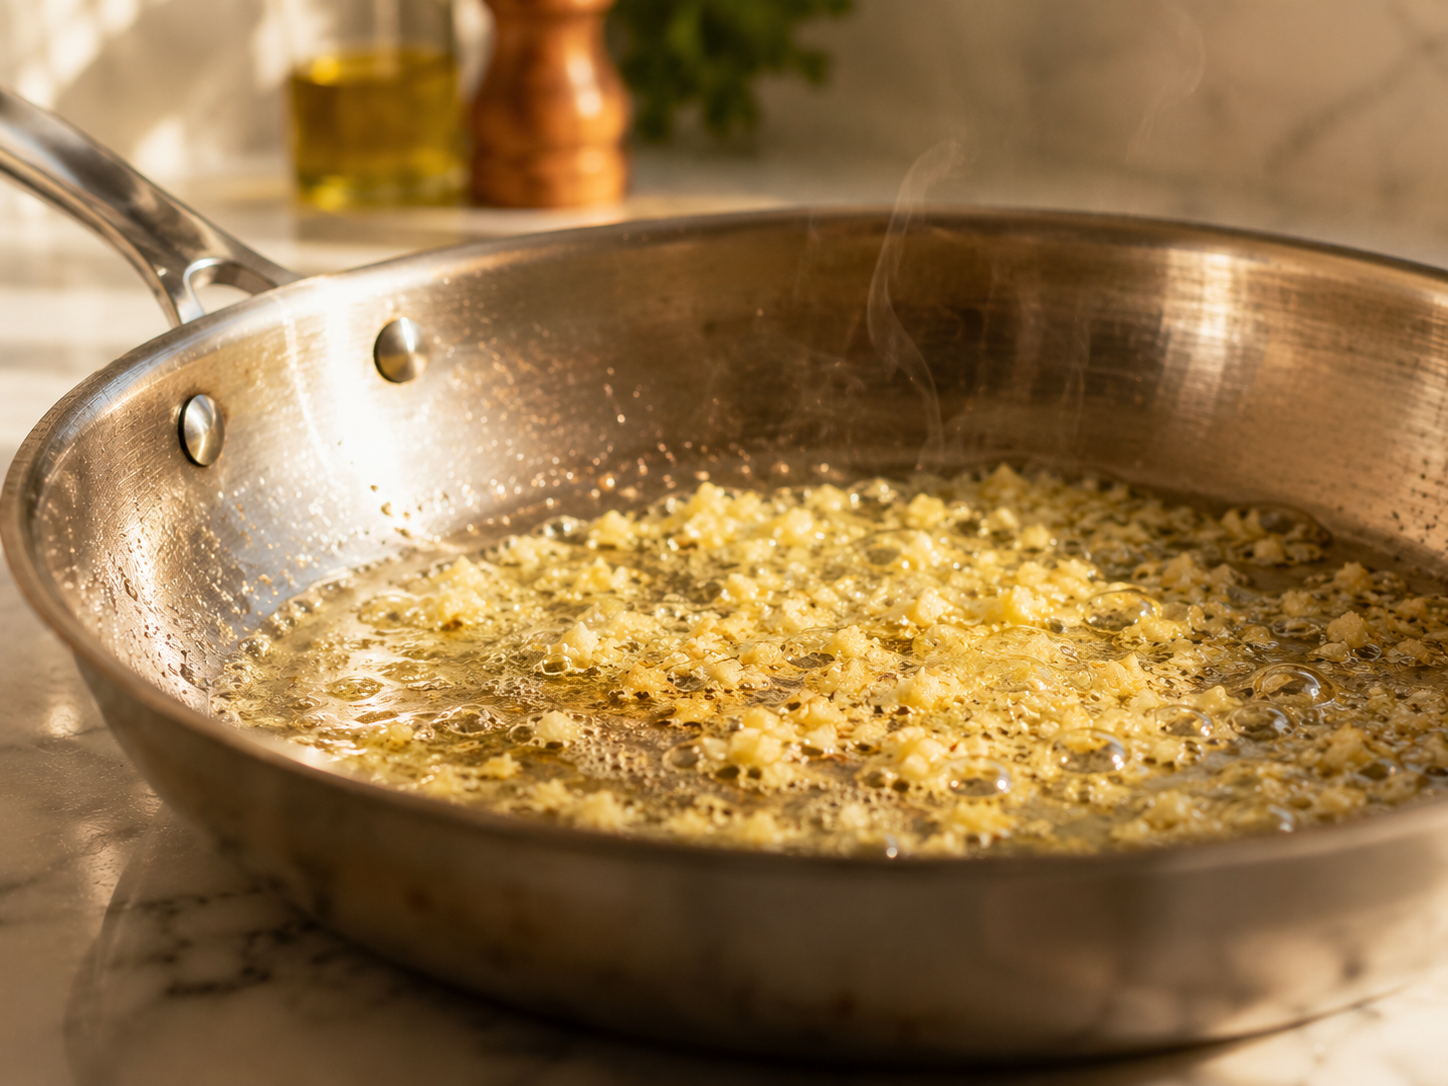
3Heat your pan. Place a large skillet over medium-high heat. Let it get properly hot before adding anything — this helps the cauliflower cook rather than steam.
-
4Cook the garlic. Add butter to the hot pan. Once melted, add minced garlic and cook for about 30 seconds until fragrant. Keep stirring so it doesn’t burn.💡 Watch the garlic carefully — it goes from golden and fragrant to burnt in seconds. Keep it moving and pull the pan off heat for a moment if it’s coloring too fast.
-
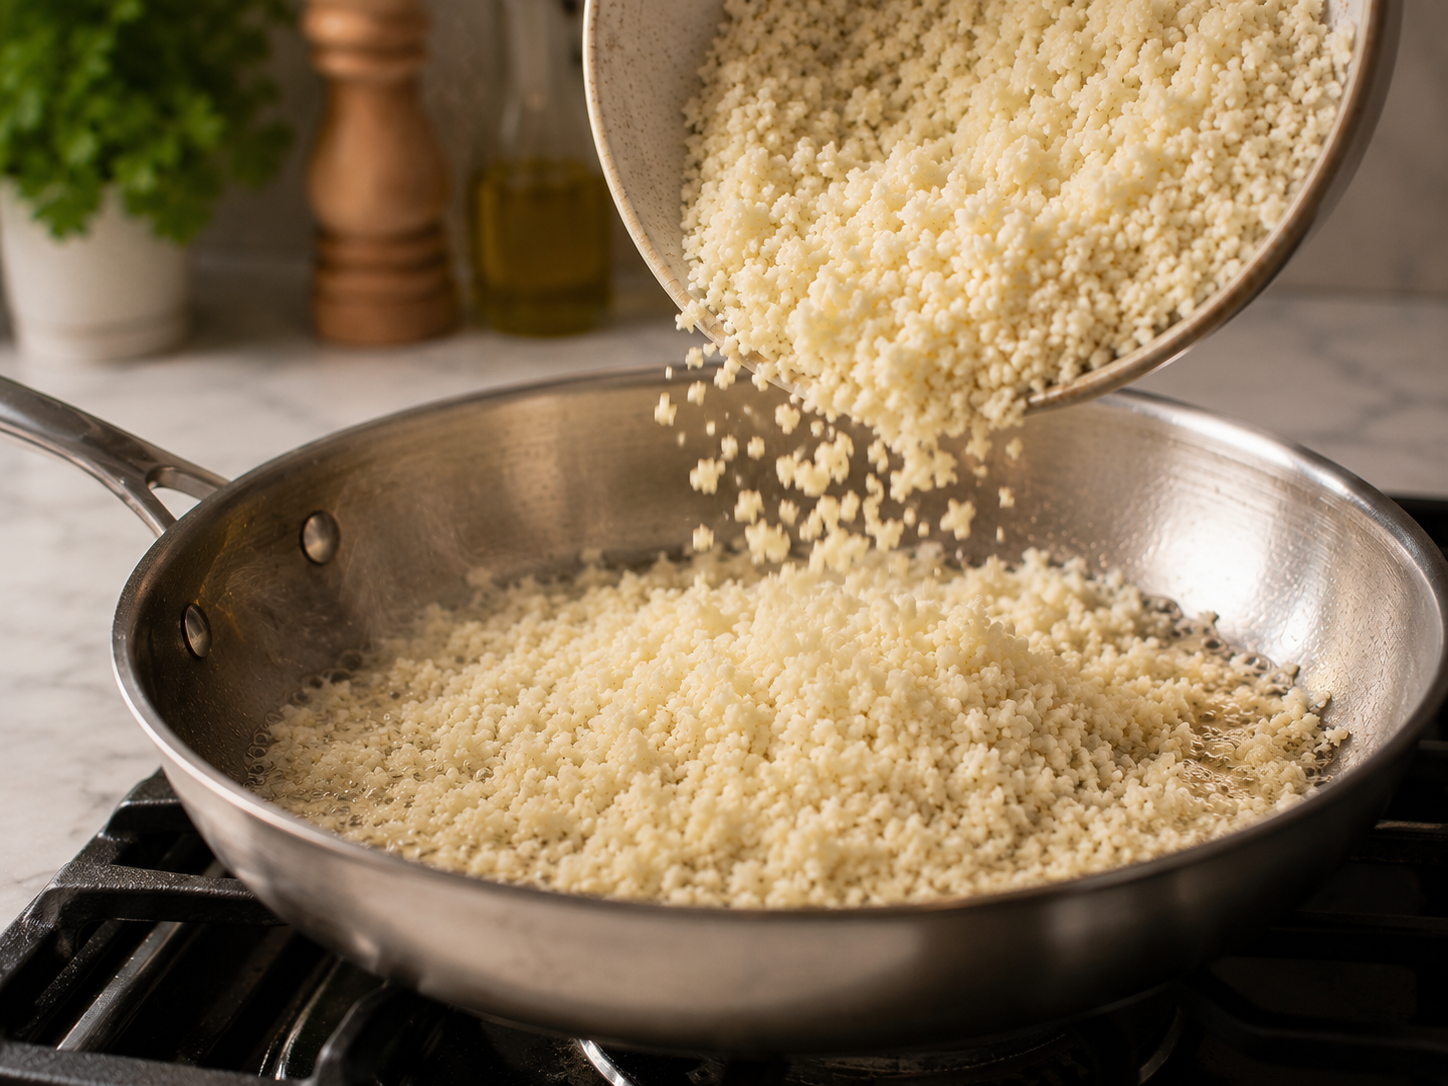
5Add the cauliflower rice. Pour in the riced cauliflower and spread it into an even layer. Let it sit undisturbed for 2 minutes to get a little golden on the bottom, then stir and repeat.
-
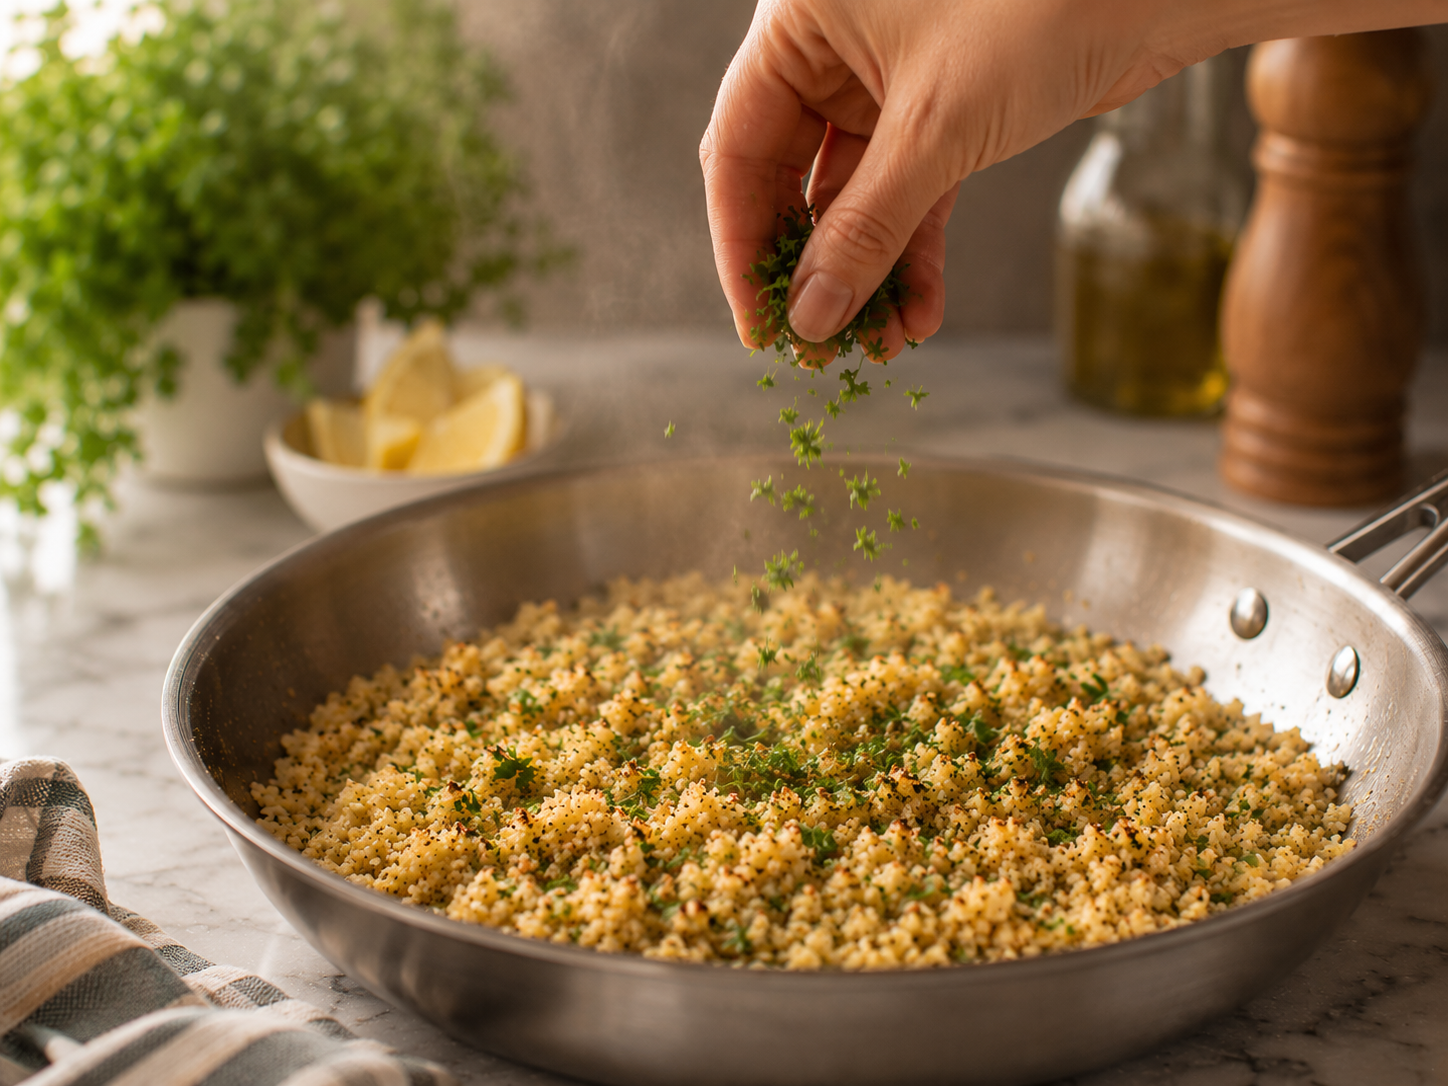
6Season and finish. After about 5–7 minutes total, the cauliflower should be tender and lightly golden in spots. Season with salt, pepper, and any optional spices. Stir in fresh parsley and a squeeze of lemon if using.
-
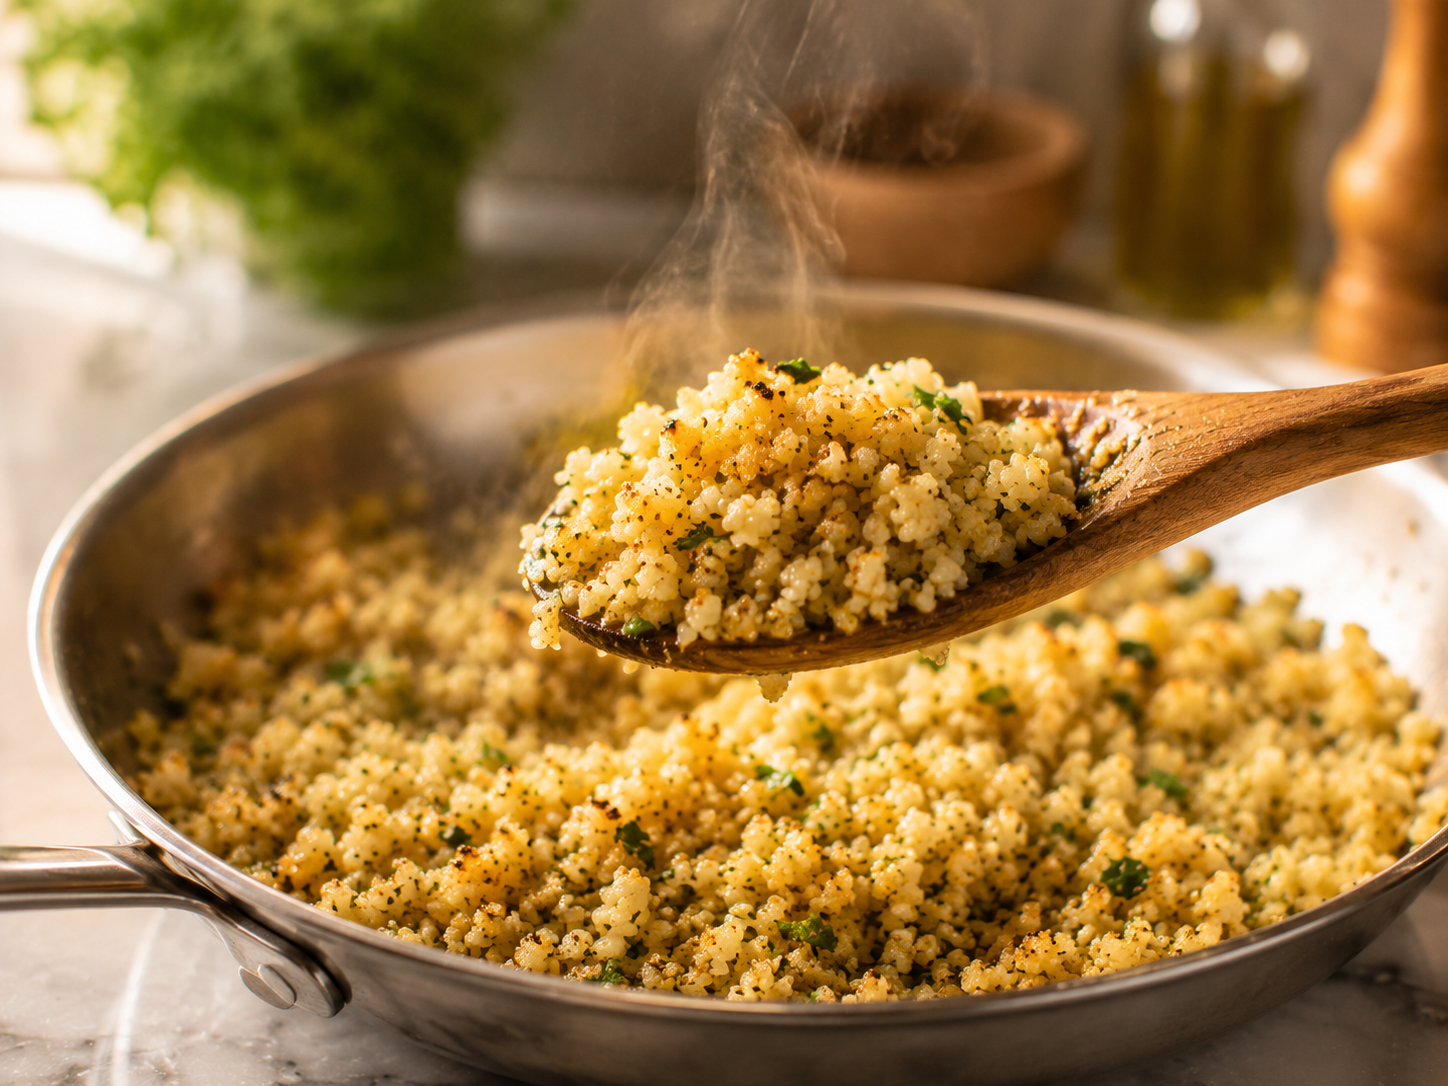
7Taste and adjust. Give it a final taste — add more butter, salt, or lemon as needed. Serve hot straight from the pan.
Garlic Butter Cauliflower Rice (The Low Carb Side Dish You’ll Actually Crave)
🧄 Ingredients
- 1 ¾ cauliflower head, cut into florets
- 2 ¾ tbsp butter
- 3 ¾ garlic cloves, minced
- 1 ¾ tsp salt
- 1 ¾ tsp black pepper
- 2 ¾ tbsp fresh parsley, chopped
- 1 ¾ tsp onion powder
- 1 ¾ tsp smoked paprika
- 1 ¾ tbsp fresh lemon juice
- 2 ¾ tbsp parmesan cheese, grated
📋 Instructions
-
1
Cut the cauliflower into florets and pulse in a food processor in batches, 8–10 short pulses, until it resembles rice. Do not over-process.
💡 Alternatively, use the large holes of a box grater if you don\'t have a food processor. -
2
Transfer the riced cauliflower to a clean kitchen towel or paper towels and squeeze out as much moisture as possible.
💡 This step is key — removing moisture prevents soggy cauliflower rice. -
3
Heat a large skillet over medium-high heat until hot. Add butter and let it melt completely.
💡 A properly hot pan gives you golden, fluffy rice instead of steamed mush. -
4
Add minced garlic to the butter and cook for 30 seconds, stirring constantly, until fragrant.
💡 Watch carefully — garlic burns fast. -
5
Add the cauliflower rice and spread into an even layer. Cook undisturbed for 2 minutes, then stir and repeat until lightly golden and tender, about 5–7 minutes total.
💡 Don\'t overcrowd the pan — cook in two batches for large amounts. -
6
Season with salt, pepper, onion powder, and smoked paprika if using. Stir in fresh parsley and a squeeze of lemon juice.
💡 Taste and adjust seasoning — cauliflower needs a bit more salt than regular rice. -
7
Optional: stir in parmesan cheese off the heat for a creamy, richer finish. Serve immediately while hot.
Nutrition Per Serving
💡 Pro Tips
- Don’t skip drying the cauliflower. Extra moisture = steamed, soggy rice. Squeezing it out in a towel makes a real difference in texture.
- Use high heat. Medium-high is your friend here. Lower heat causes steaming instead of that nice golden sear.
- Don’t overcrowd the pan. If you’re making a large batch, cook in two rounds. Piling it all in at once drops the temperature and you’ll end up with a mushy pile.
- Frozen cauliflower rice? Don’t thaw it. Add it straight to the hot pan — it releases moisture as it cooks, which actually helps you control it better.
- Add parmesan at the end. Stir in 2 tablespoons just before serving for a creamy, richer version that feels almost indulgent.
- Season generously. Cauliflower needs a little more salt than regular rice to really shine.
Variations to Try
Stir in 2 tbsp cream cheese or a splash of heavy cream in the last minute of cooking. Add parmesan on top. Rich, silky, and so good alongside steak or chicken thighs.
Add a scrambled egg, a splash of soy sauce (or coconut aminos for keto), a drizzle of sesame oil, and chili flakes. Toss with green onions. Tastes like takeout fried rice but lighter and way faster.
Use a bag of frozen cauliflower rice straight from the freezer. Heat in a pan with butter and garlic for 5–6 minutes, season well, and you’re done. Perfect weeknight shortcut with zero prep.
Serving Ideas
- As a side dish alongside grilled chicken, salmon, or shrimp
- Under a stir-fry — the garlic butter flavor works beautifully with saucy dishes
- In a bowl topped with a fried egg and avocado for a quick lunch
- With curry or stew instead of regular rice
- As a base for meal prep bowls — pairs with pretty much any protein
- Serve with a squeeze of lemon and extra parsley for a bright, fresh finish
Storage & Reheating
| Where | How long | Notes |
|---|---|---|
| ❄️ Fridge | Up to 3 days | Airtight container — texture holds up well |
| 🧊 Freezer | Up to 1 month | Spread flat in a freezer bag, press out air — reheat directly from frozen |
| 🔥 Reheat (stovetop) | 3–4 min | Medium heat with a small knob of butter — best texture result |
| 📱 Reheat (microwave) | 30-sec intervals | Stir between each — avoid covered reheating, it traps steam and makes it mushy |
Frequently Asked Questions
This is one of those recipes that quietly becomes a staple once you try it. It’s quick, it’s easy, and it genuinely tastes good — not just “good for a healthy version,” but actually good. The garlic butter situation makes all the difference.
Whether you’re eating low carb or just looking for a lighter side that doesn’t take forever, this cauliflower rice recipe is worth making at least once. I have a feeling it’ll show up on your table more than you expect.
Give it a try and let me know what you think! 🌿

Get new recipes in your inbox 🍋
No spam — just the good stuff, straight to you.