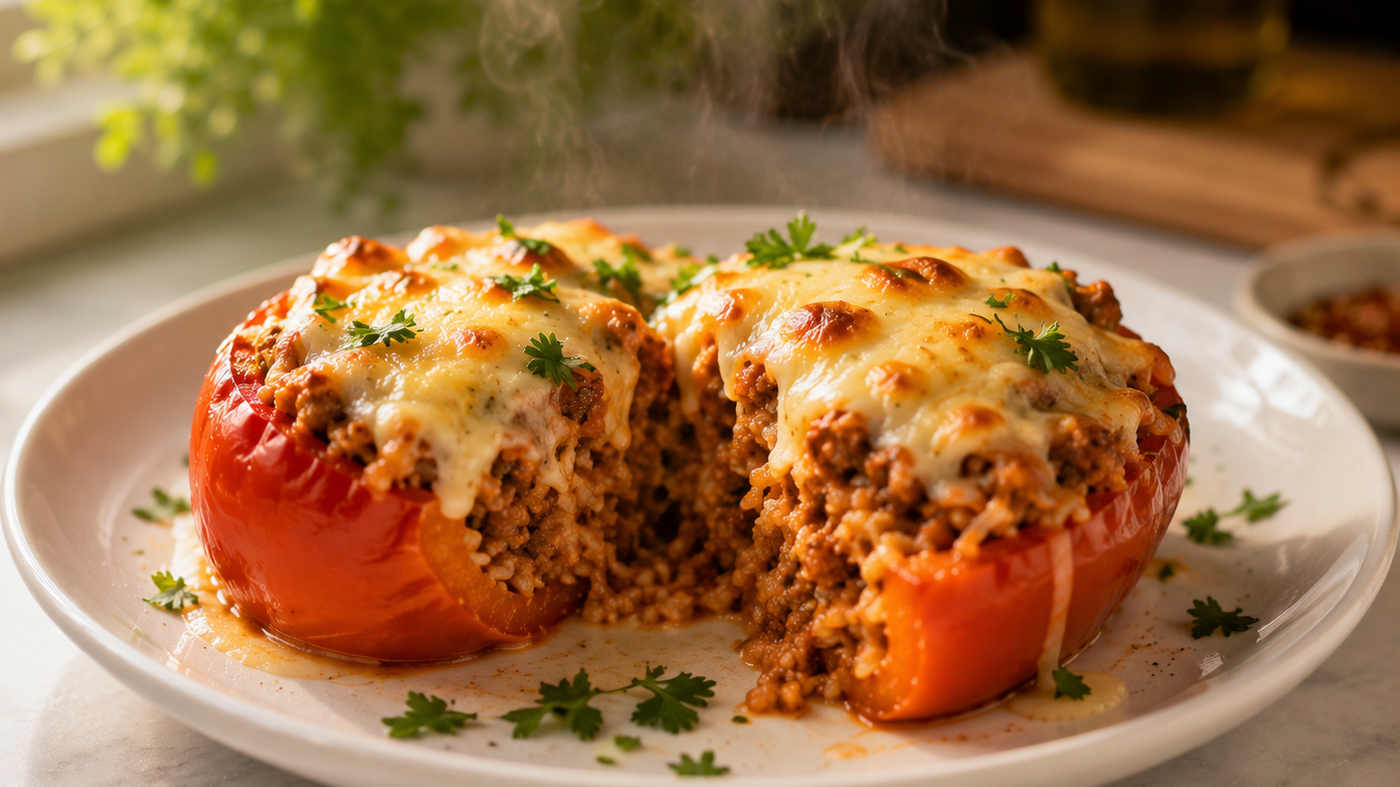
Soft, sweet peppers filled with seasoned ground beef, rice, and tomato — then finished with melted, golden cheese. One baking dish, real comfort food, and a dinner table that goes quiet in the best possible way.
There are certain dinners that just feel like a hug — and stuffed bell peppers are exactly that for us.
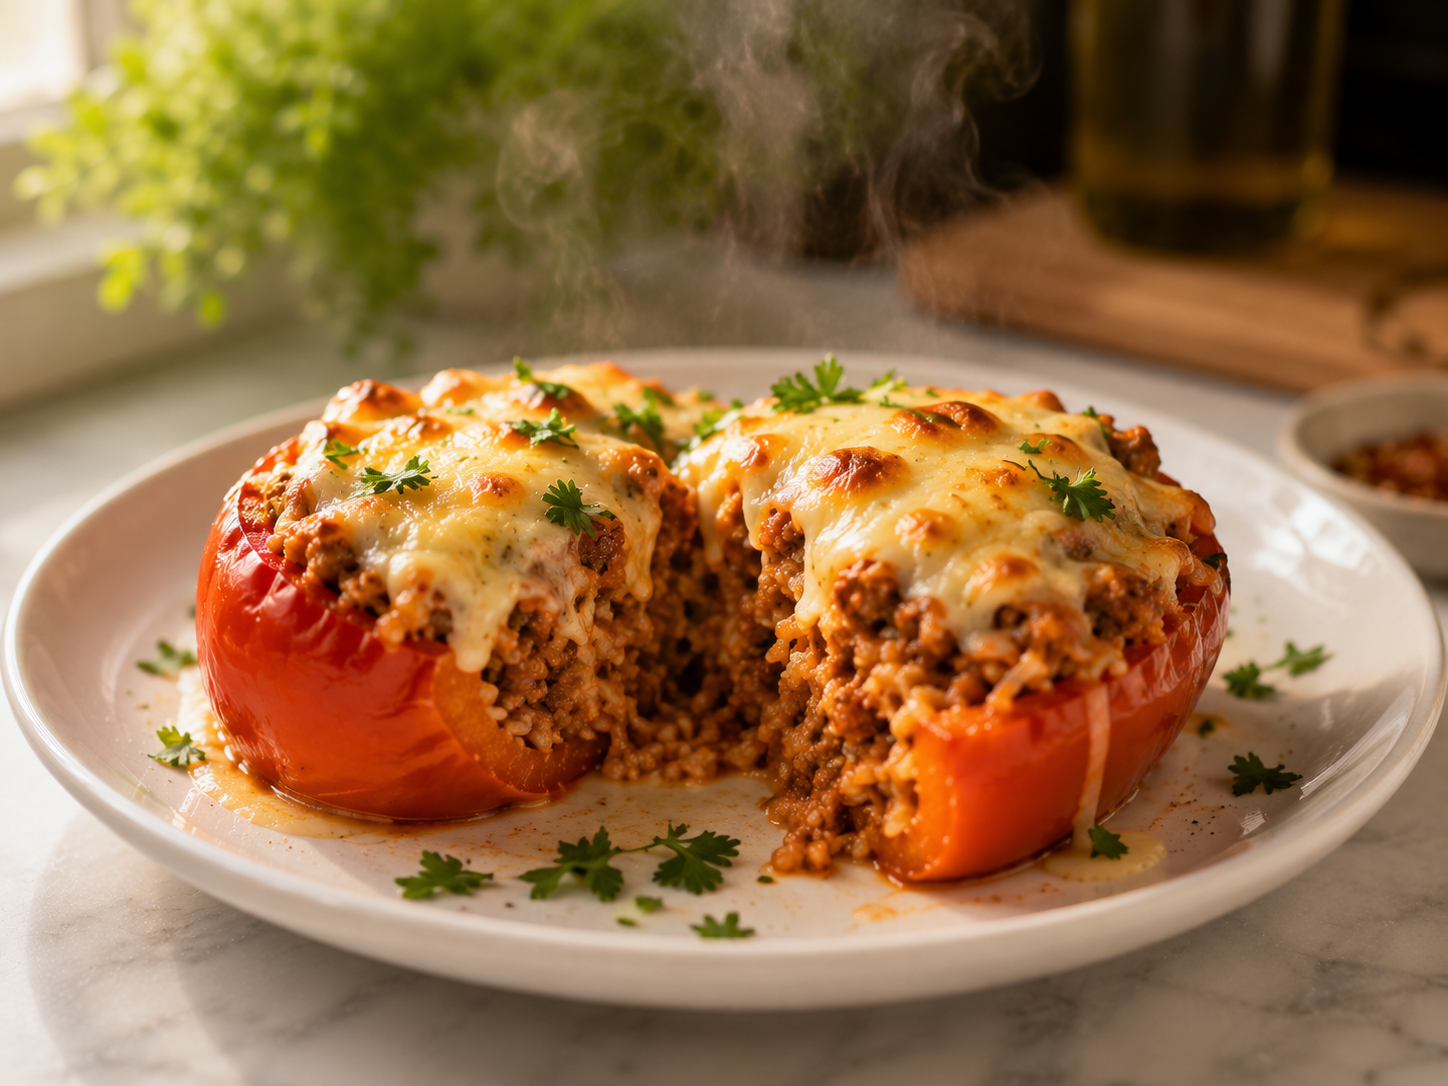
The peppers get soft and a little sweet in the oven. The filling is rich and savory, packed with seasoned ground beef, rice, and tomato. And then there’s the cheese on top — melted, golden, slightly bubbling at the edges. My family goes quiet when I put these on the table, and that’s honestly the best sign a recipe can get.
I’ve been making some version of stuffed bell peppers since my mid-twenties, and I’ve slowly dialed in exactly what makes them work. The seasoning in the filling, how long to pre-cook the peppers, when to add the cheese. It’s not complicated at all — but the little things add up to something that feels really special.
This is an easy dinner recipe that works on a weeknight when you’re tired but still want to put something real on the table. It also happens to look impressive, which is a bonus when you’re having people over and don’t want to spend three hours in the kitchen.
Why You’ll Love This Recipe
- One baking dish — minimal cleanup, maximum comfort
- Flexible filling — works with beef, turkey, chicken, or a vegetarian mix
- Cheesy, satisfying, and filling — this is real comfort food
- Great for meal prep — make a batch and reheat all week
- Kid-friendly — even picky eaters tend to love the cheesy filling
- Budget-friendly — ground beef, rice, and canned tomatoes keep the cost low
- Naturally gluten-free — no flour, no fuss
Step-by-Step Instructions
-
1Preheat your oven to 375°F (190°C). Get the oven going first so it’s fully heated by the time your peppers are ready to go in.
-
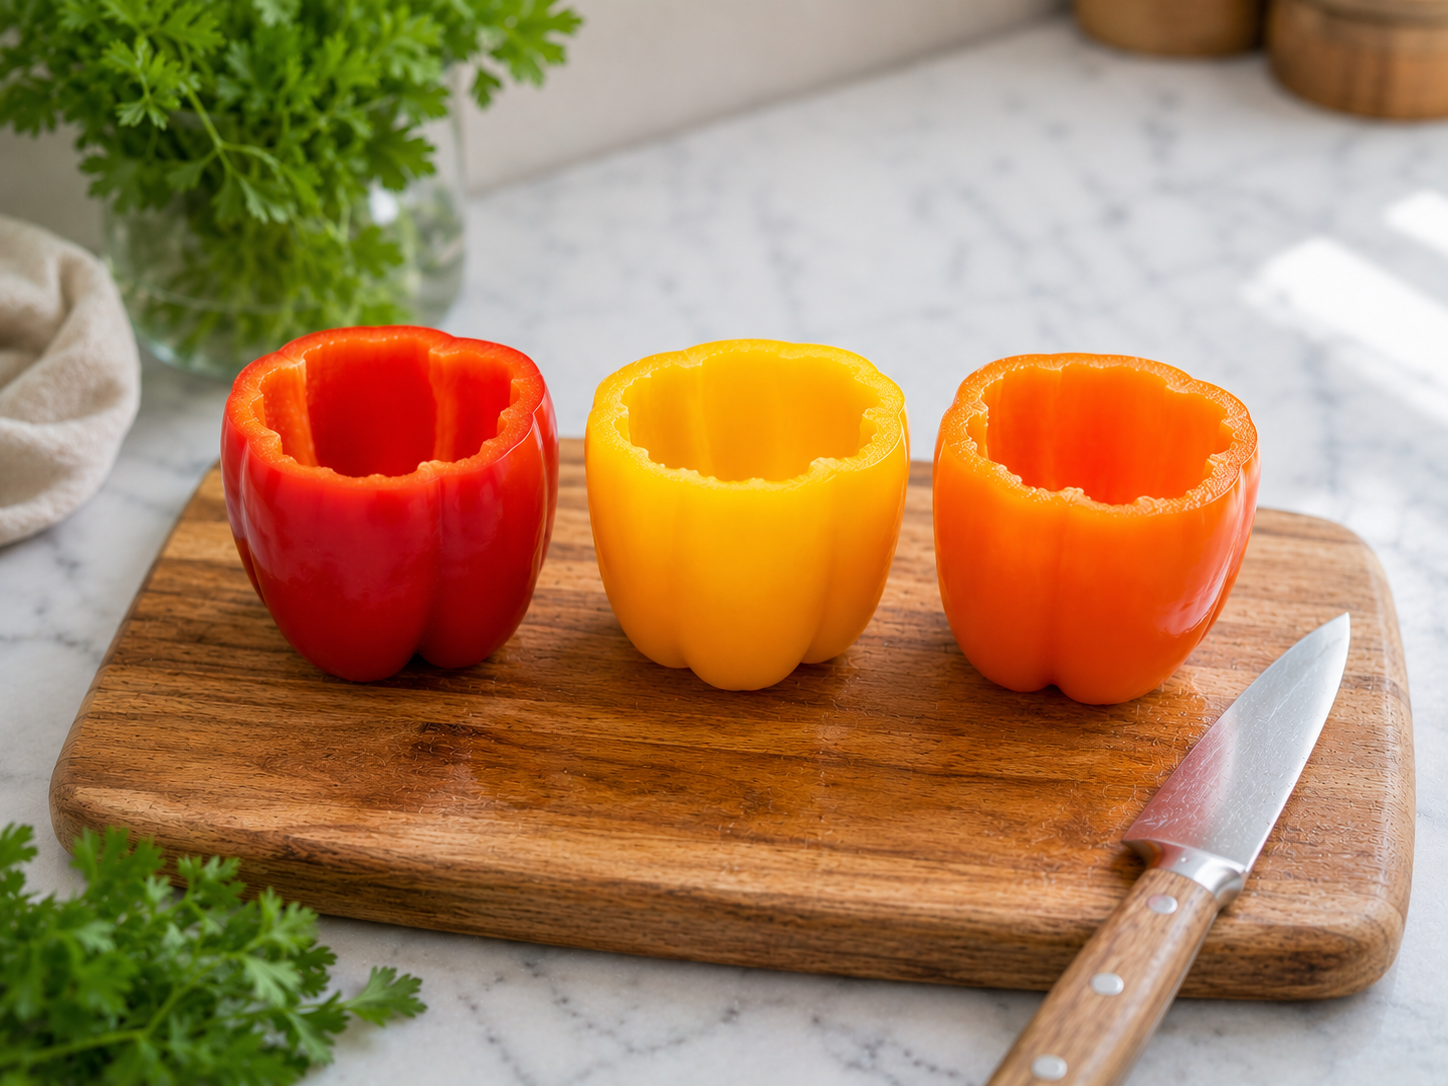
2Prepare the peppers. Slice off the tops and set them aside — you can dice the tops and add them to the filling if you don’t want to waste them. Remove the seeds and white membrane from inside each pepper. Rub a tiny bit of olive oil inside each one and season lightly with salt and pepper.
-
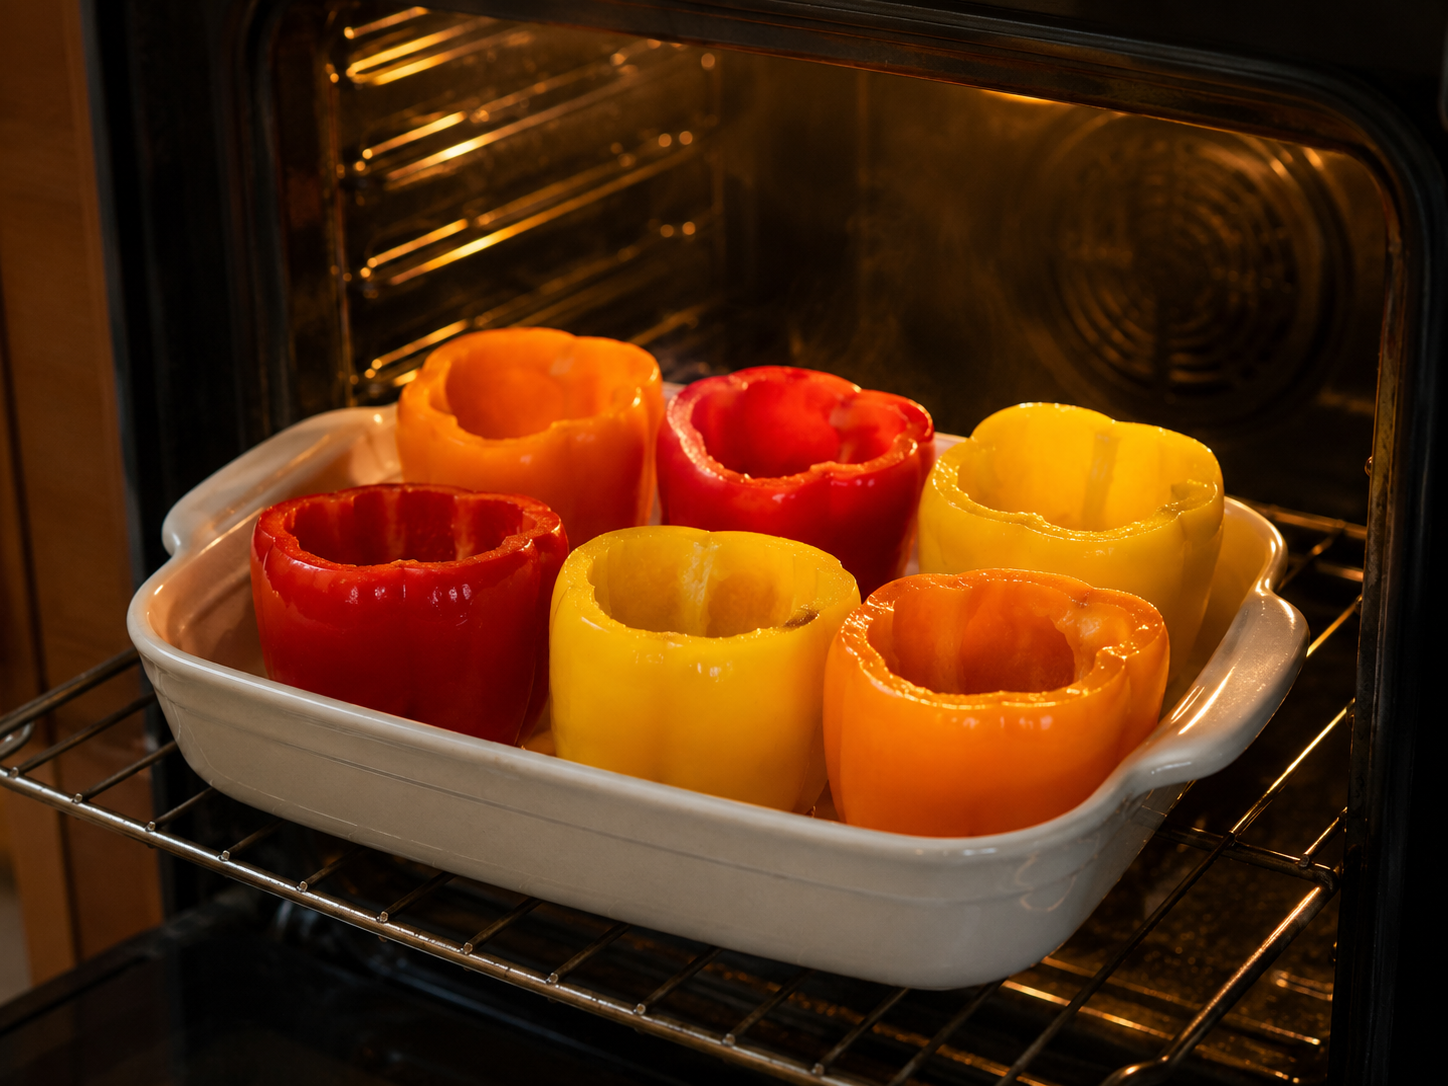
3Pre-bake the peppers for 10 minutes. Stand the peppers upright in a baking dish and put them in the oven for about 10 minutes, uncovered. This gives them a head start so they’re fully tender once the filling is added. Skip this step if you prefer a firmer pepper texture.💡 Pre-baking is the single step that makes the biggest difference — skip it and you risk a slightly crunchy pepper even after the full bake time.
-
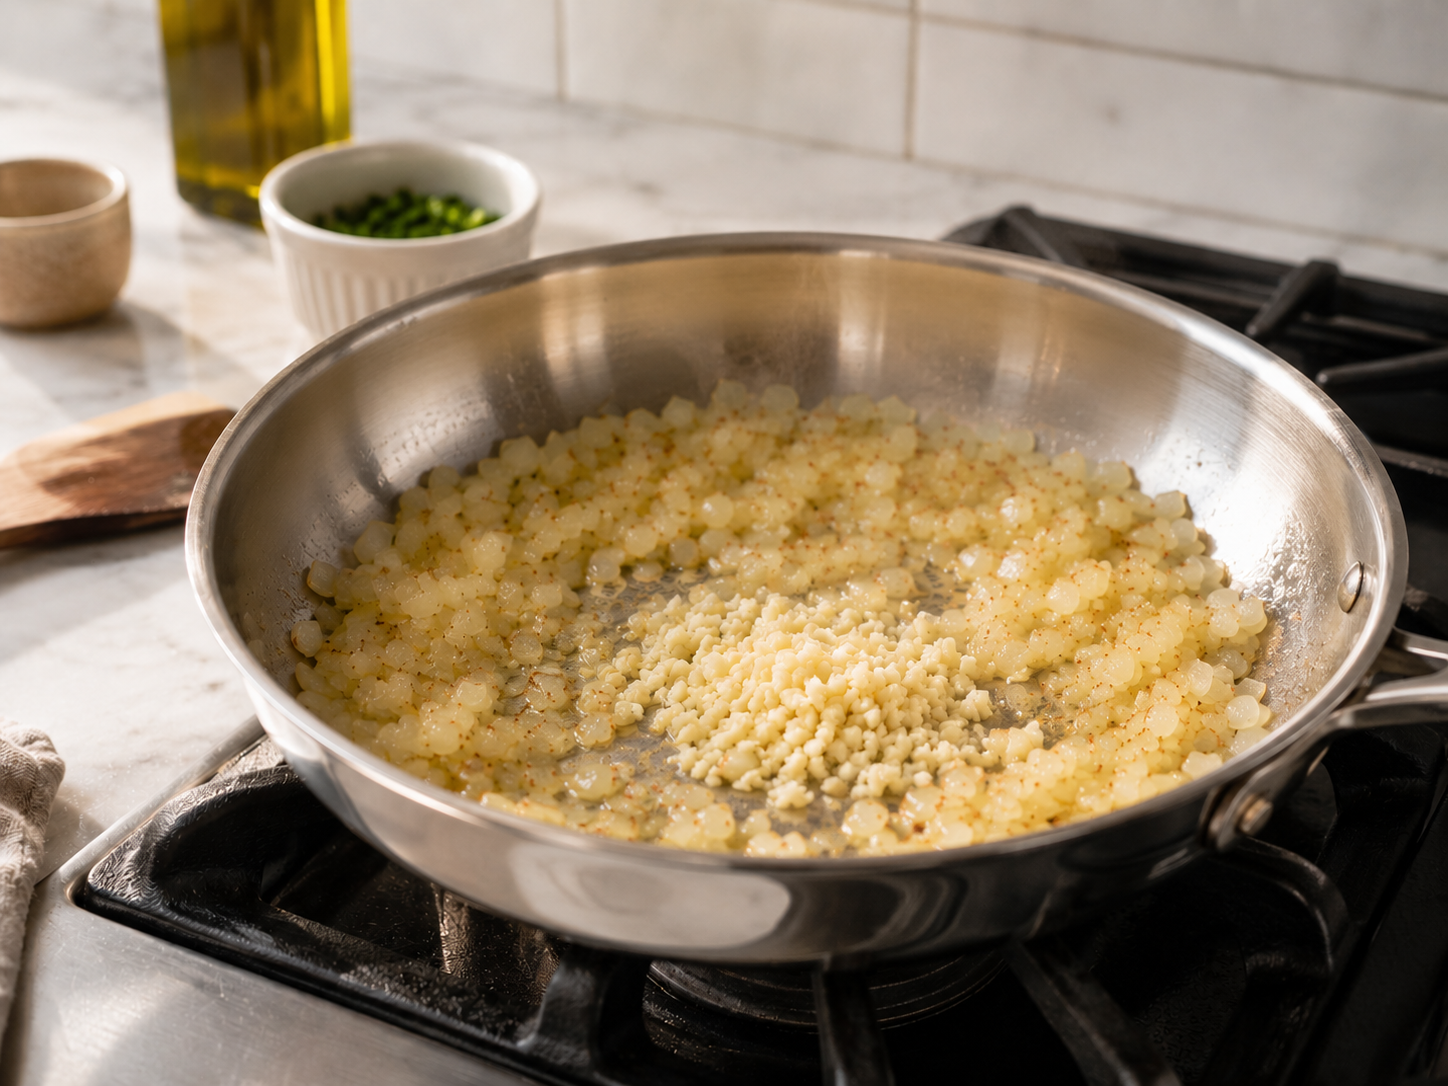
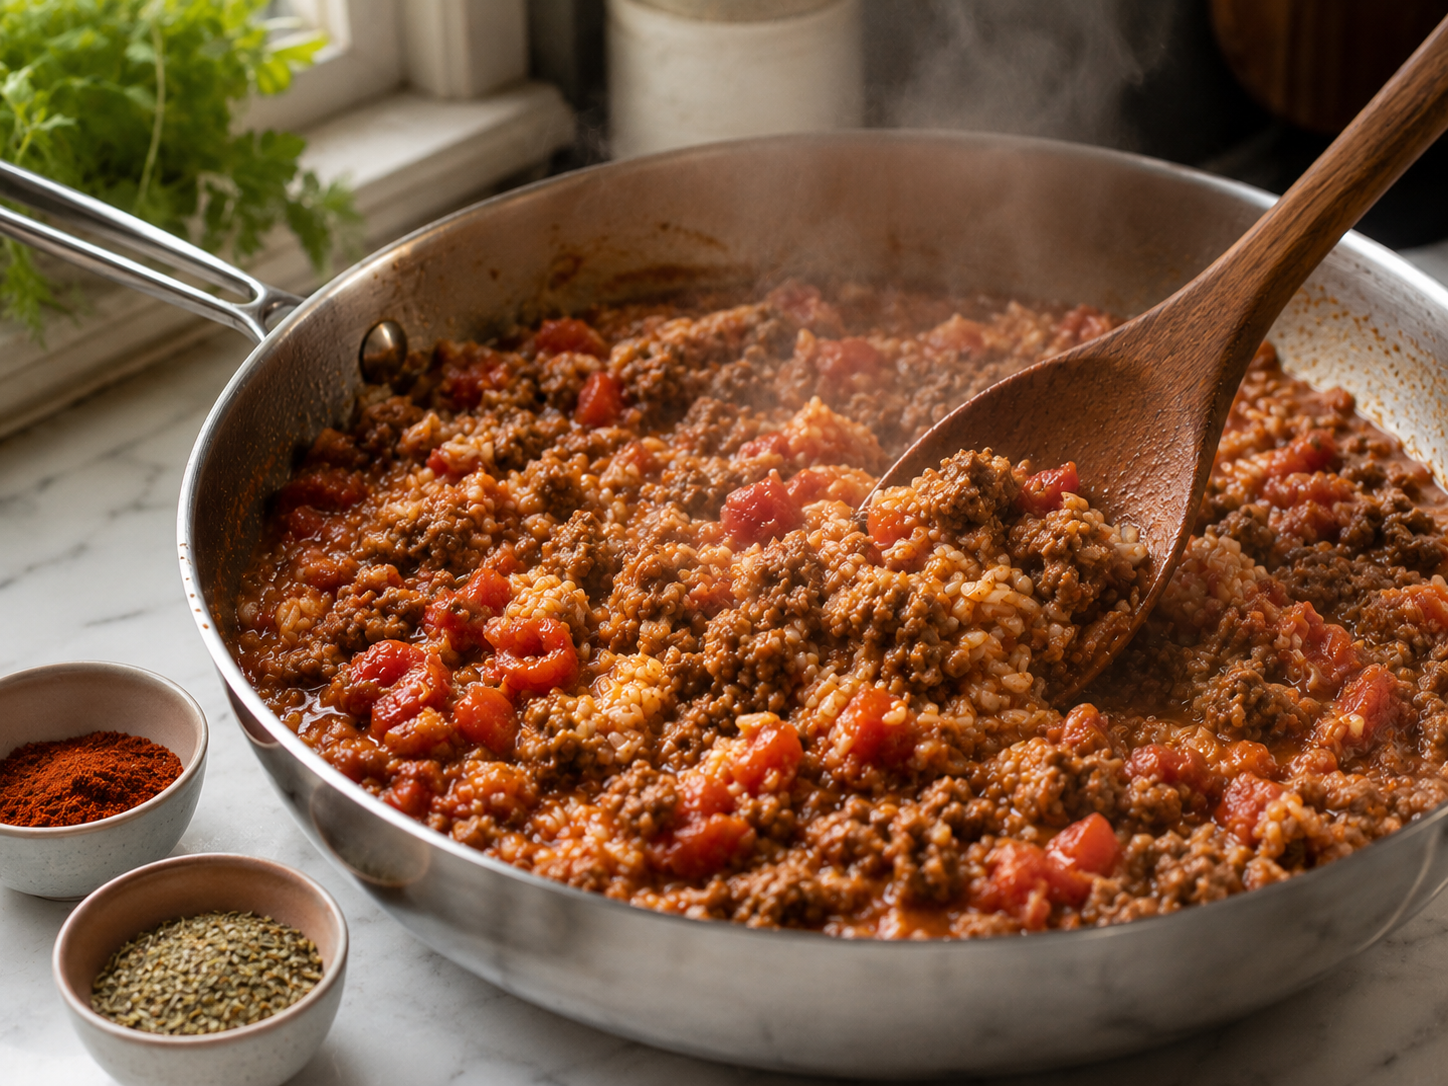
4Make the filling. Heat 1 tbsp of olive oil in a large skillet over medium-high heat. Add the diced onion and cook for 3–4 minutes until soft and translucent. Add the garlic and cook for another minute until fragrant.
-
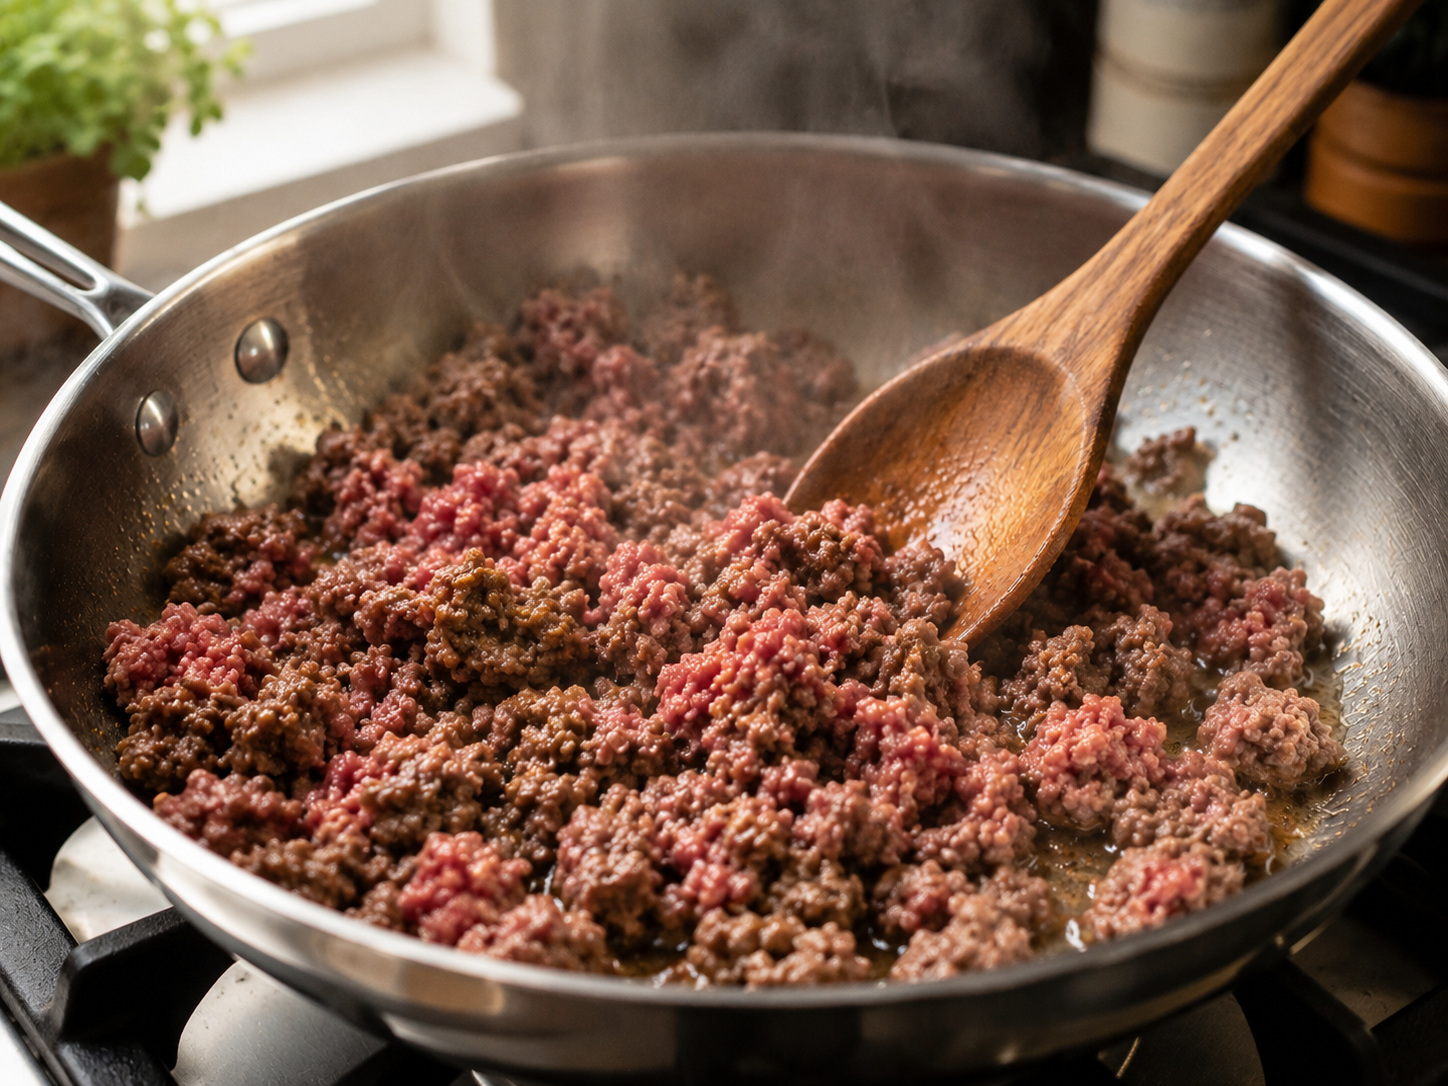
5Brown the ground beef. Add the ground beef to the skillet and break it apart with a spoon. Cook for 6–8 minutes, stirring occasionally, until fully browned and no pink remains. Drain any excess fat if needed.
-
6Season and finish the filling. Stir in the tomato paste and cook for 1 minute — this deepens the flavor. Add the drained diced tomatoes, Italian seasoning, smoked paprika, cumin, salt, and pepper. Stir everything together and let it simmer for 3–4 minutes until the mixture thickens slightly. Remove from heat and fold in the cooked rice.💡 Cooking the tomato paste for a full minute before adding the tomatoes caramelizes it slightly and gives the filling a much deeper, richer flavor.
-
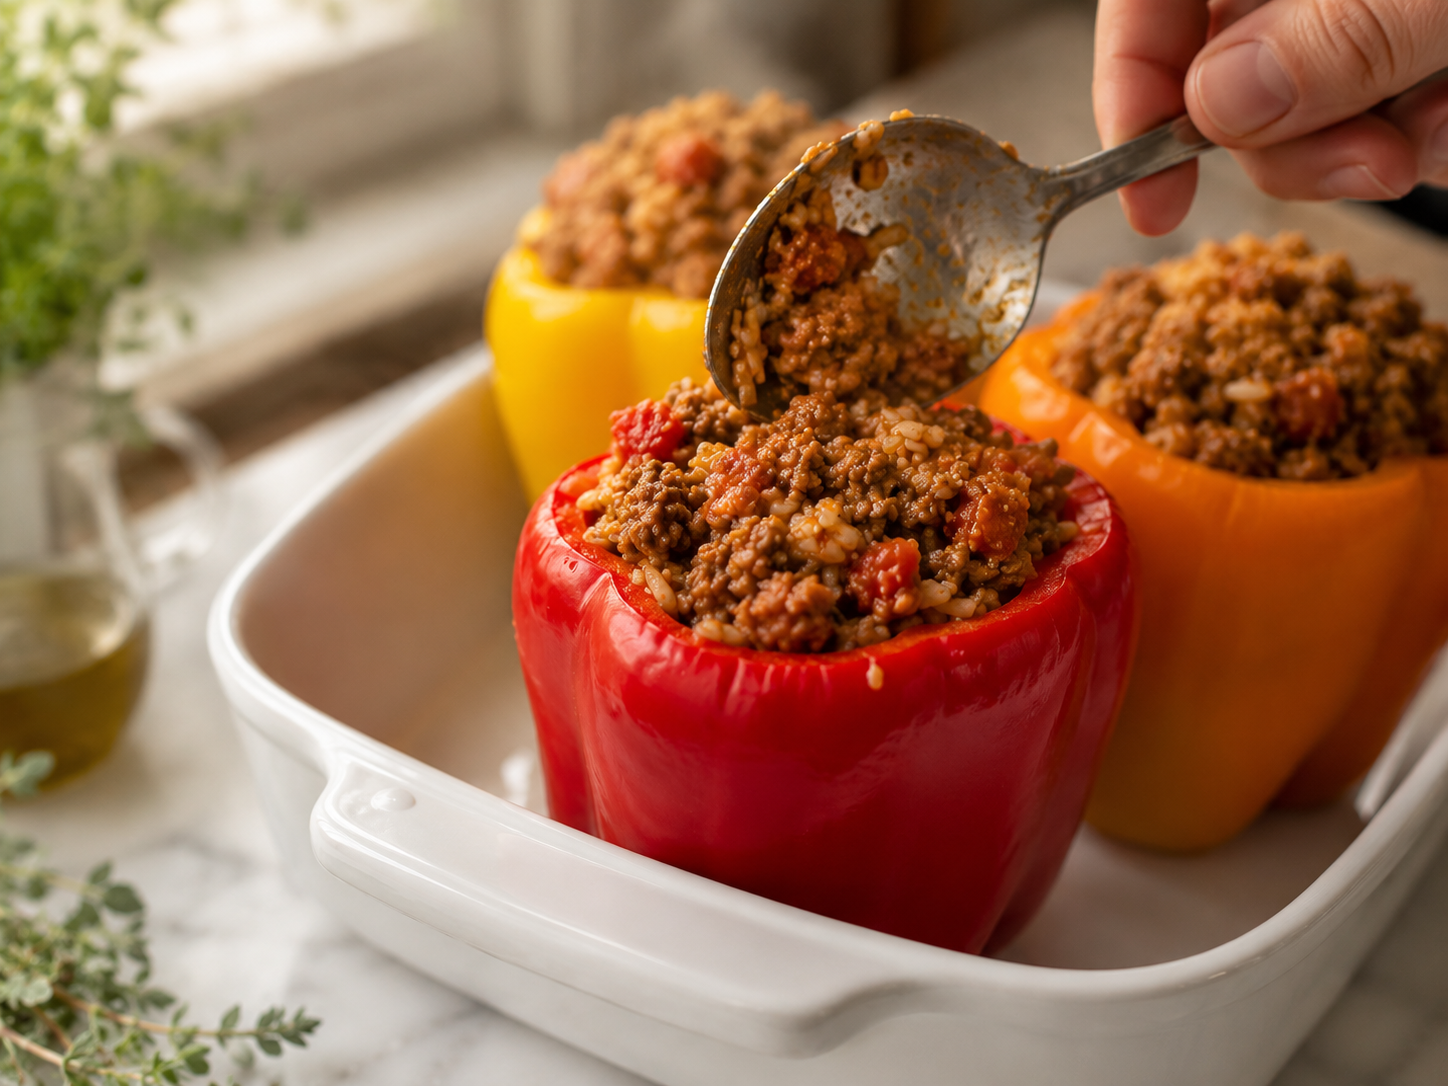
7Fill each pepper. Use a spoon to pack the filling into each pre-baked pepper. Don’t be shy — really pack them. Mound the filling slightly above the top of each pepper.
-
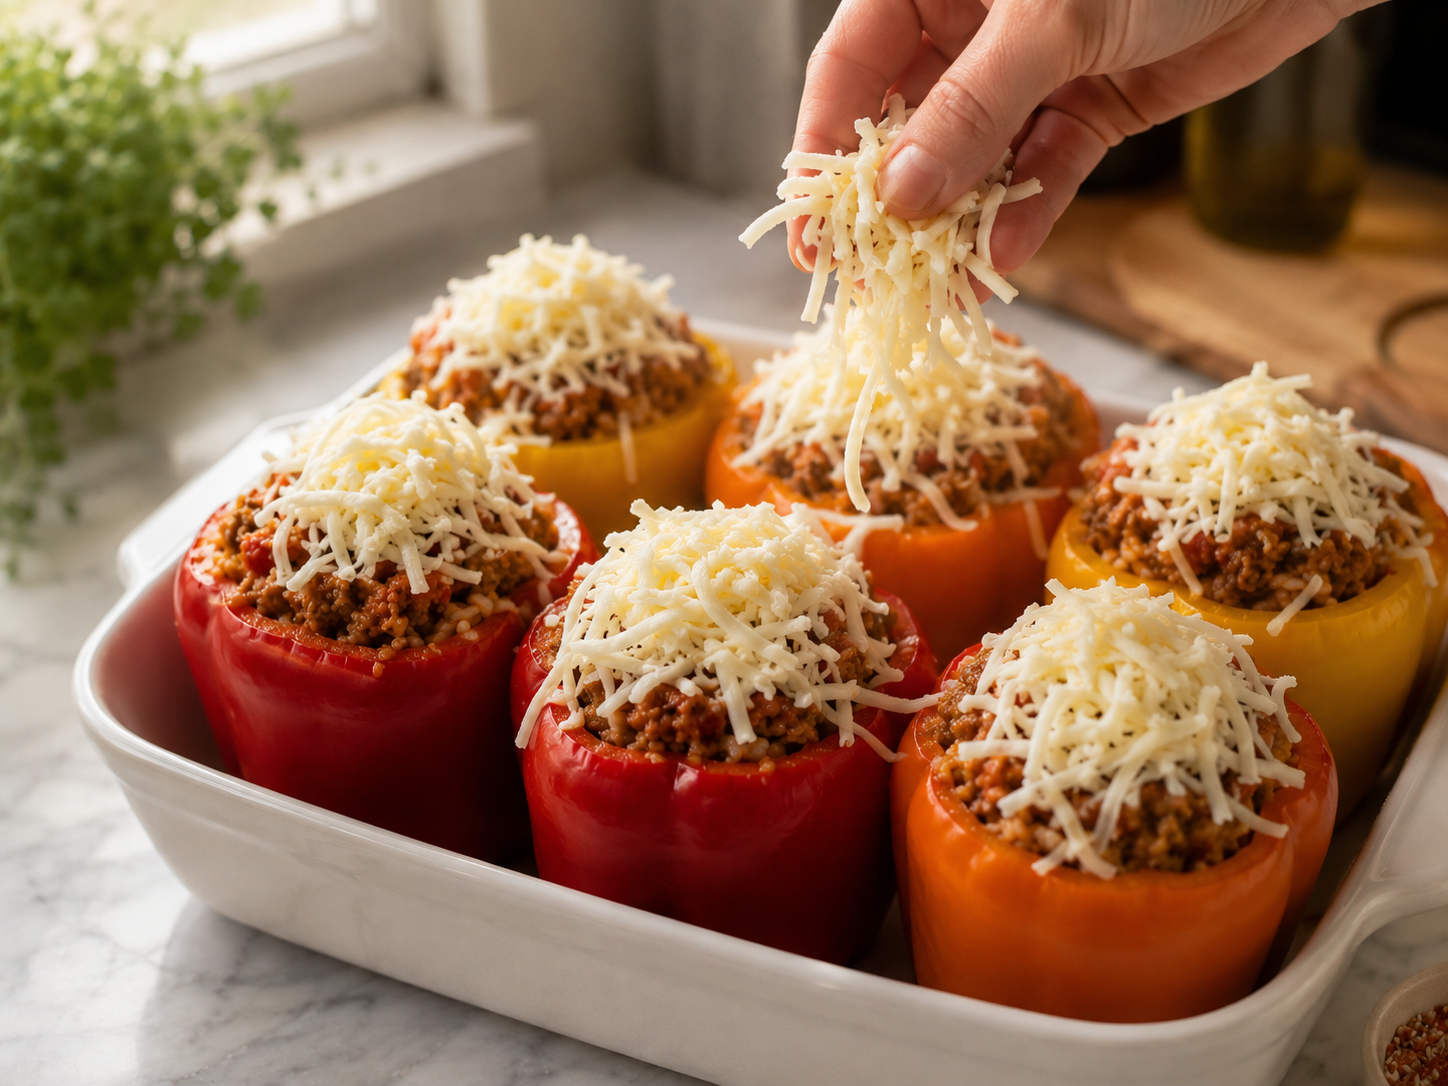
8Add the cheese. Sprinkle a generous amount of shredded mozzarella over each filled pepper. Don’t hold back here — the melted cheese on top is half the appeal.
-
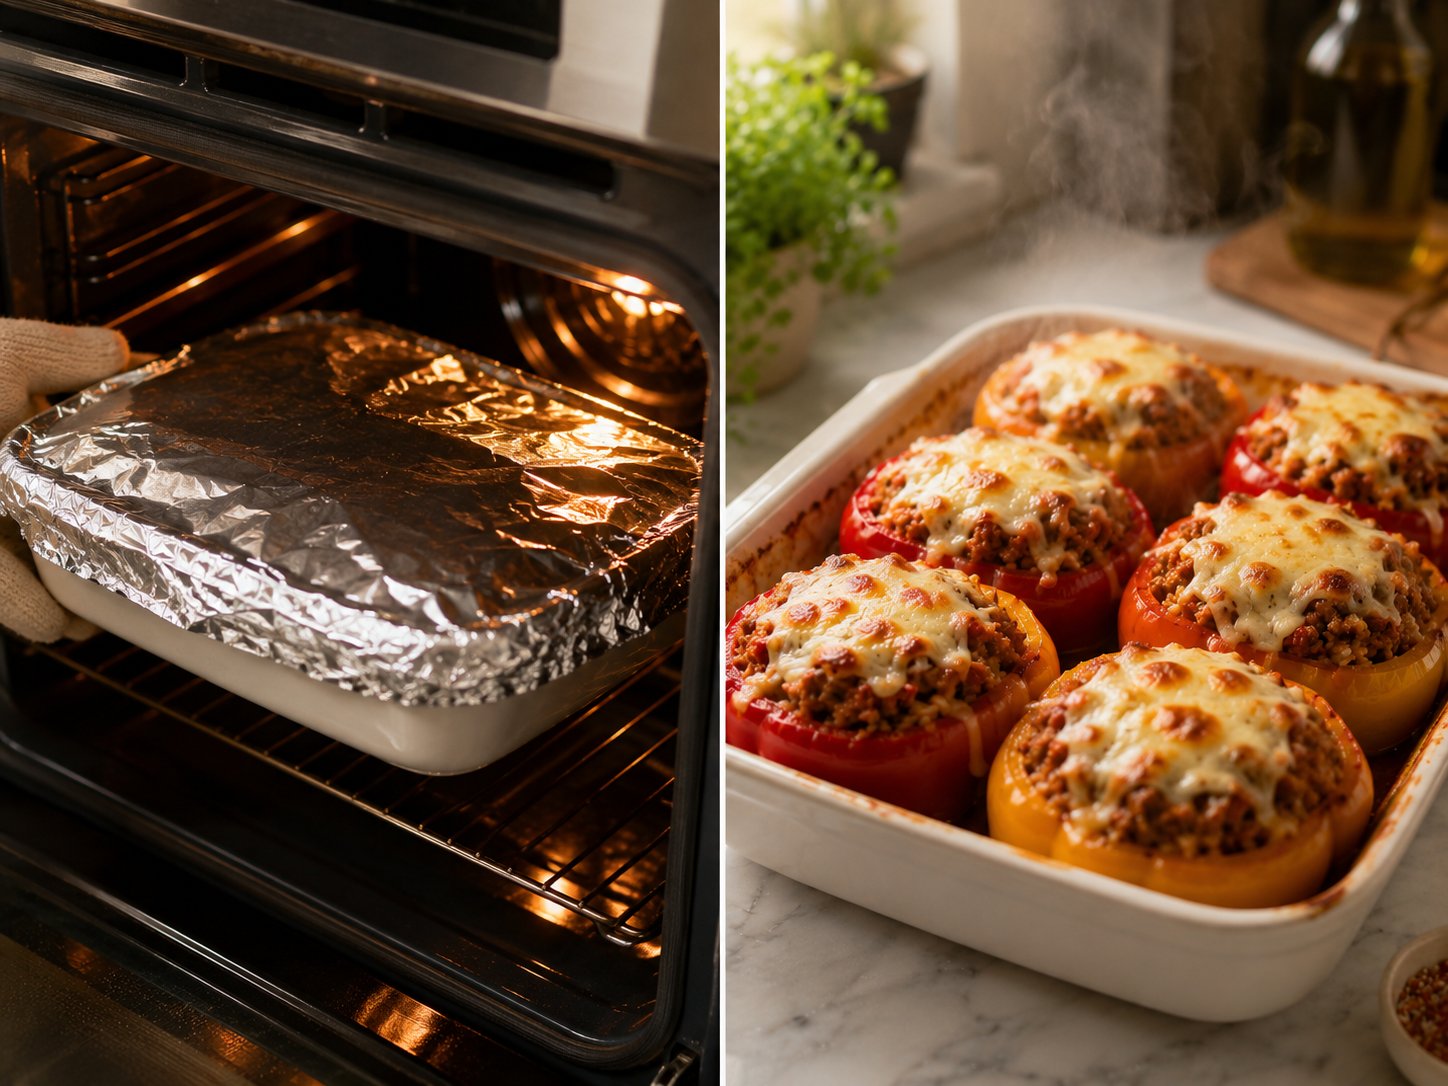
9Bake covered, then uncovered. Cover the baking dish tightly with foil and bake for 20 minutes. Then remove the foil and bake for another 10–15 minutes until the cheese is melted, bubbly, and starting to turn golden at the edges.⚠️ Watch closely once you remove the foil — the cheese can go from perfectly golden to over-browned quickly in the last few minutes.
-
10Rest and serve. Let them sit for 5 minutes before serving. Finish with fresh parsley or a few basil leaves on top.💛 The 5-minute rest is important — it lets the filling settle and hold together so it doesn’t collapse when you cut into the pepper.
Cheesy Stuffed Bell Peppers That the Whole Family Will Ask For Again
🧄 Ingredients
- 6 ¾ large bell peppers
- 2 ¾ tbsp olive oil
- 450 ¾ g ground beef 80/20
- 1 ¾ cup cooked white rice
- 400 ¾ g canned diced tomatoes, drained
- 2 ¾ tbsp tomato paste
- 1 ¾ yellow onion, finely diced
- 3 ¾ garlic cloves, minced
- 1 ¾ tsp Italian seasoning
- 1 ¾ tsp smoked paprika
- 1 ¾ tsp cumin
- 1 ¾ tsp salt and black pepper
- 150 ¾ g shredded mozzarella cheese
- 2 ¾ tbsp fresh parsley or basil
📋 Instructions
-
1
Preheat oven to 375°F (190°C). Slice the tops off each bell pepper and remove seeds and white membrane. Rub the inside lightly with olive oil and season with salt and pepper.
💡 Save the diced tops to add into the filling so nothing goes to waste -
2
Stand the peppers upright in a baking dish and pre-bake for 10 minutes uncovered. Remove and set aside.
💡 Pre-baking ensures the pepper is tender all the way through after the final bake -
3
Heat 1 tbsp olive oil in a large skillet over medium-high heat. Add diced onion and cook for 3 to 4 minutes until soft. Add garlic and cook 1 more minute.
💡 Don\'t rush the onion — soft and translucent gives a sweeter base flavor -
4
Add ground beef and break apart with a spoon. Cook for 6 to 8 minutes until fully browned. Drain excess fat if needed.
💡 Brown the meat well for deeper, richer flavor in the filling -
5
Stir in tomato paste and cook 1 minute. Add drained diced tomatoes, Italian seasoning, smoked paprika, cumin, salt, and pepper. Simmer for 3 to 4 minutes until slightly thickened.
💡 Cooking the tomato paste briefly before adding liquid deepens the overall flavor -
6
Remove from heat and fold in cooked rice until evenly combined.
💡 The filling should be thick and scoopable, not wet -
7
Spoon the filling firmly into each pre-baked pepper, packing it in tightly and mounding slightly above the rim.
💡 Pack the filling tight so it holds together when sliced -
8
Top each pepper generously with shredded mozzarella cheese.
💡 More cheese = better. Don\'t hold back here -
9
Cover the baking dish tightly with foil and bake for 20 minutes. Remove foil and bake uncovered for another 10 to 15 minutes until the cheese is melted and golden.
💡 The uncovered phase is what gives you that beautiful bubbly golden cheese top -
10
Remove from oven and rest for 5 minutes before serving. Garnish with fresh parsley or basil.
💡 Resting lets the filling settle so it holds its shape when cut
Nutrition Per Serving
💡 Pro Tips
- Pre-bake the peppers first. This is the step that makes the biggest difference. Pre-baking for 10 minutes before adding the filling ensures the pepper is tender all the way through instead of slightly crunchy in the middle. Totally worth the extra step.
- Drain the canned tomatoes well. Too much liquid in the filling makes it watery. Press the tomatoes gently in a colander or just drain them thoroughly before adding.
- Pack the filling tight. Spoon it in and press down firmly. A loosely packed pepper looks sad and falls apart when you cut into it.
- Use freshly shredded cheese. Pre-shredded bags have a coating that prevents it from melting as beautifully. If you have two minutes to shred from a block, the difference is visible.
- Add tomato sauce to the bottom of the dish. Pour about ½ cup of marinara or crushed tomatoes into the bottom of the baking dish before adding the peppers. It keeps them moist and creates an incredible sauce underneath.
- Let them rest. Five minutes out of the oven lets everything settle so the filling holds together when you cut into the pepper.
Variations to Try
Use hot Italian sausage instead of ground beef, add ½ tsp red pepper flakes, and finish with a spicy arrabbiata sauce at the bottom of the dish. Bold, rich, and really satisfying.
Swap the rice for cauliflower rice and use a mix of cream cheese and mozzarella in the filling for an extra creamy, low carb version. The filling becomes rich and almost like a cheesy beef dip inside a pepper.
Replace ground beef with a mix of black beans, corn, cooked quinoa, and sautéed mushrooms. Season with cumin and chili powder for a Tex-Mex spin. Top with pepper jack. So hearty you genuinely don’t miss the meat.
Microwave the peppers 3–4 min instead of oven pre-baking, use microwaveable rice, and a jarred marinara for the filling. Dinner in under 30 minutes, no stress.
Serving Ideas
- Serve with a simple green salad dressed with lemon vinaigrette to balance the richness
- Crusty bread or garlic bread on the side for scooping up any filling that spills out
- A spoonful of sour cream on top of each pepper just before serving — trust me on this
- Works beautifully as a complete dinner on its own, no sides needed
- For a dinner party, use small sweet mini peppers for a cute appetizer-sized version
- Pairs well with sparkling water, iced tea, or a light red wine for an adults’ dinner
Storage & Reheating
| Where | How long | Notes |
|---|---|---|
| ❄️ Fridge | Up to 4 days | Airtight container — flavor actually deepens overnight, these reheat beautifully |
| 🧊 Freezer | Up to 3 months | Cool fully, wrap each pepper in plastic wrap, then into a freezer bag — thaw overnight in fridge |
| 🔥 Reheat (oven) | 15–20 min | 350°F covered with foil — best texture, cheese gets melty again |
| 📱 Reheat (microwave) | 90-sec intervals | Cover while heating — add a little fresh cheese on top before microwaving for that melty moment |
Frequently Asked Questions
These stuffed bell peppers are the kind of dinner that makes a regular Tuesday feel a little more special. The oven does most of the work, the house smells incredible while they’re baking, and everyone at the table gets their own little portion — which kids find oddly exciting.
Make them once and you’ll see why they stay in the rotation. They’re one of those easy dinner recipes that never gets old.
If you try them, drop a comment and tell me what color peppers you used — I’m always curious. Red and yellow are my personal favorites. 🫑🧀

Get new recipes in your inbox 🍋
No spam — just the good stuff, straight to you.