Cheesy Shredded Beef Roll-Ups — The Warm, Melty Morning Wrap You’ll Make on Repeat
Rich, cheesy, and a little indulgent in the best possible way. Made with seasoned shredded beef, melted cheese, and warm toasted tortillas — ready in under 30 minutes and impossible to stop eating.

Some mornings just call for something warm, cheesy, and a little indulgent. These Cheesy Shredded Beef Roll-Ups are exactly that. I first threw this together on a lazy Saturday when I had leftover shredded beef in the fridge and zero plans to spend more than 20 minutes in the kitchen. My family devoured them. Now it’s a regular thing around here.
If you love Mexican breakfast ideas, this one hits differently — and it actually comes together really fast.
Why You’ll Love This Recipe
- Ready in under 30 minutes — weeknight and weekend friendly
- Uses simple, everyday ingredients — nothing fancy needed
- Rich, cheesy, and satisfying — not heavy at all
- Perfect for weekend mornings or a quick weeknight dinner
- Family-friendly — kids absolutely love these
- Easily customizable — adjust the spice level to your taste
Step-by-Step Instructions
-
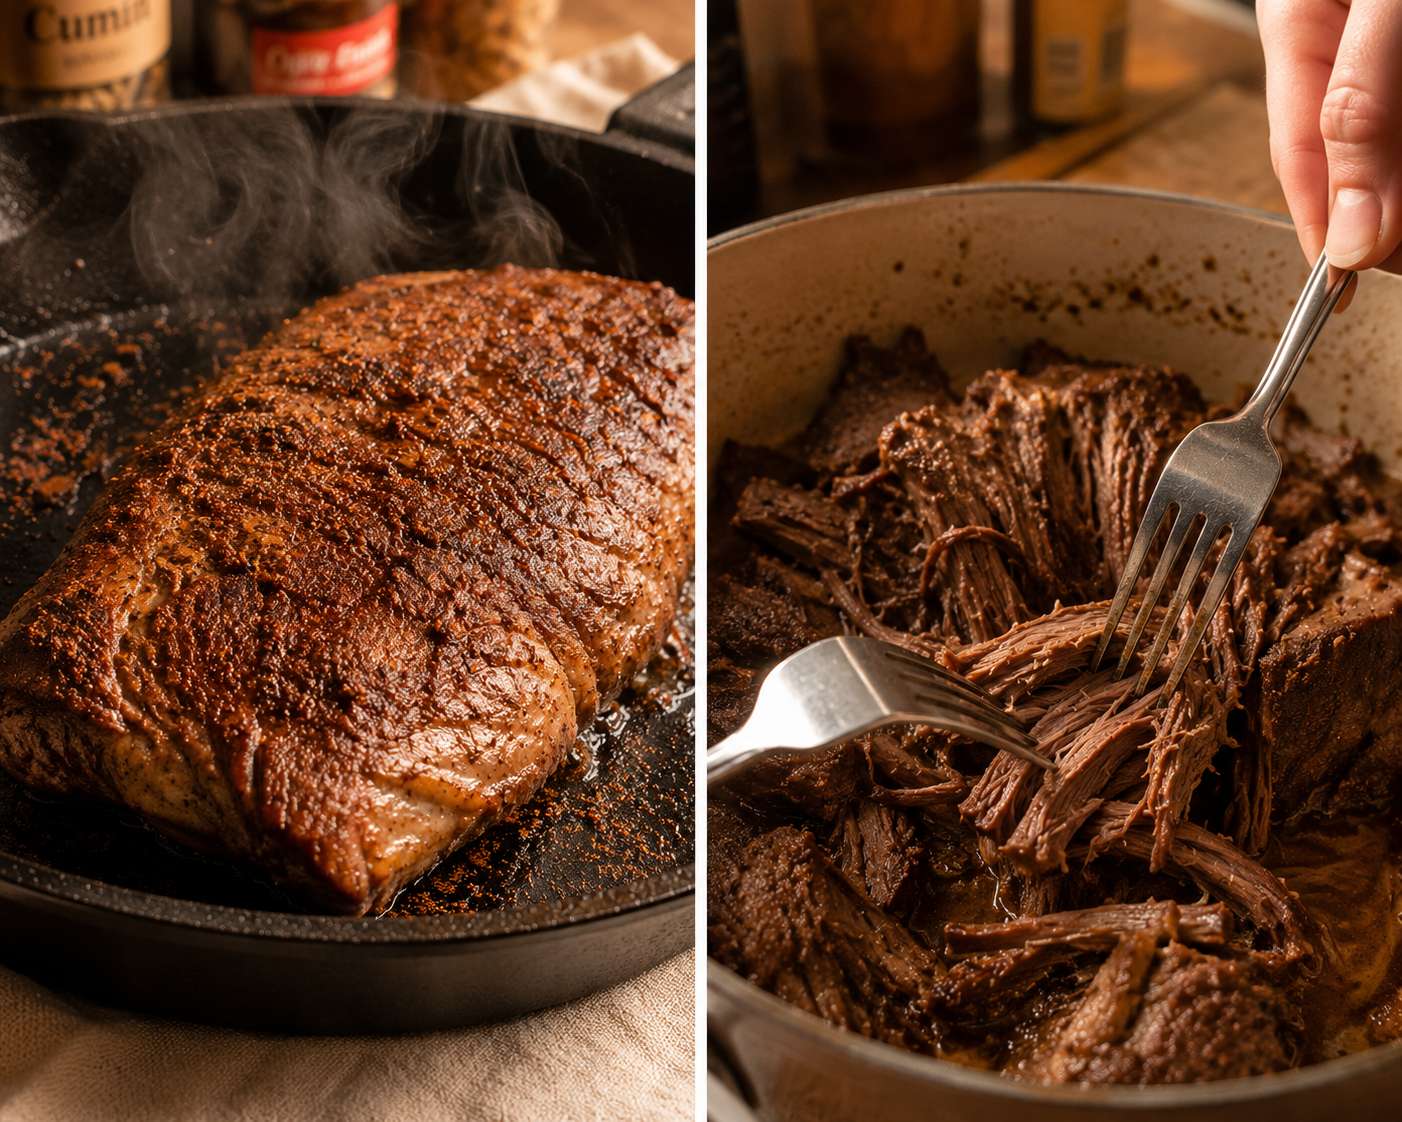
1Cook and shred the beef. Season your beef with cumin, paprika, garlic powder, onion powder, salt, and pepper. Heat olive oil in a skillet over medium-high heat. Sear the beef on both sides until browned, about 3–4 minutes per side. Add the broth, cover, and simmer on low for 45 minutes to 1 hour until tender. Shred with two forks. (If you have leftover shredded beef, skip this step entirely.)
-
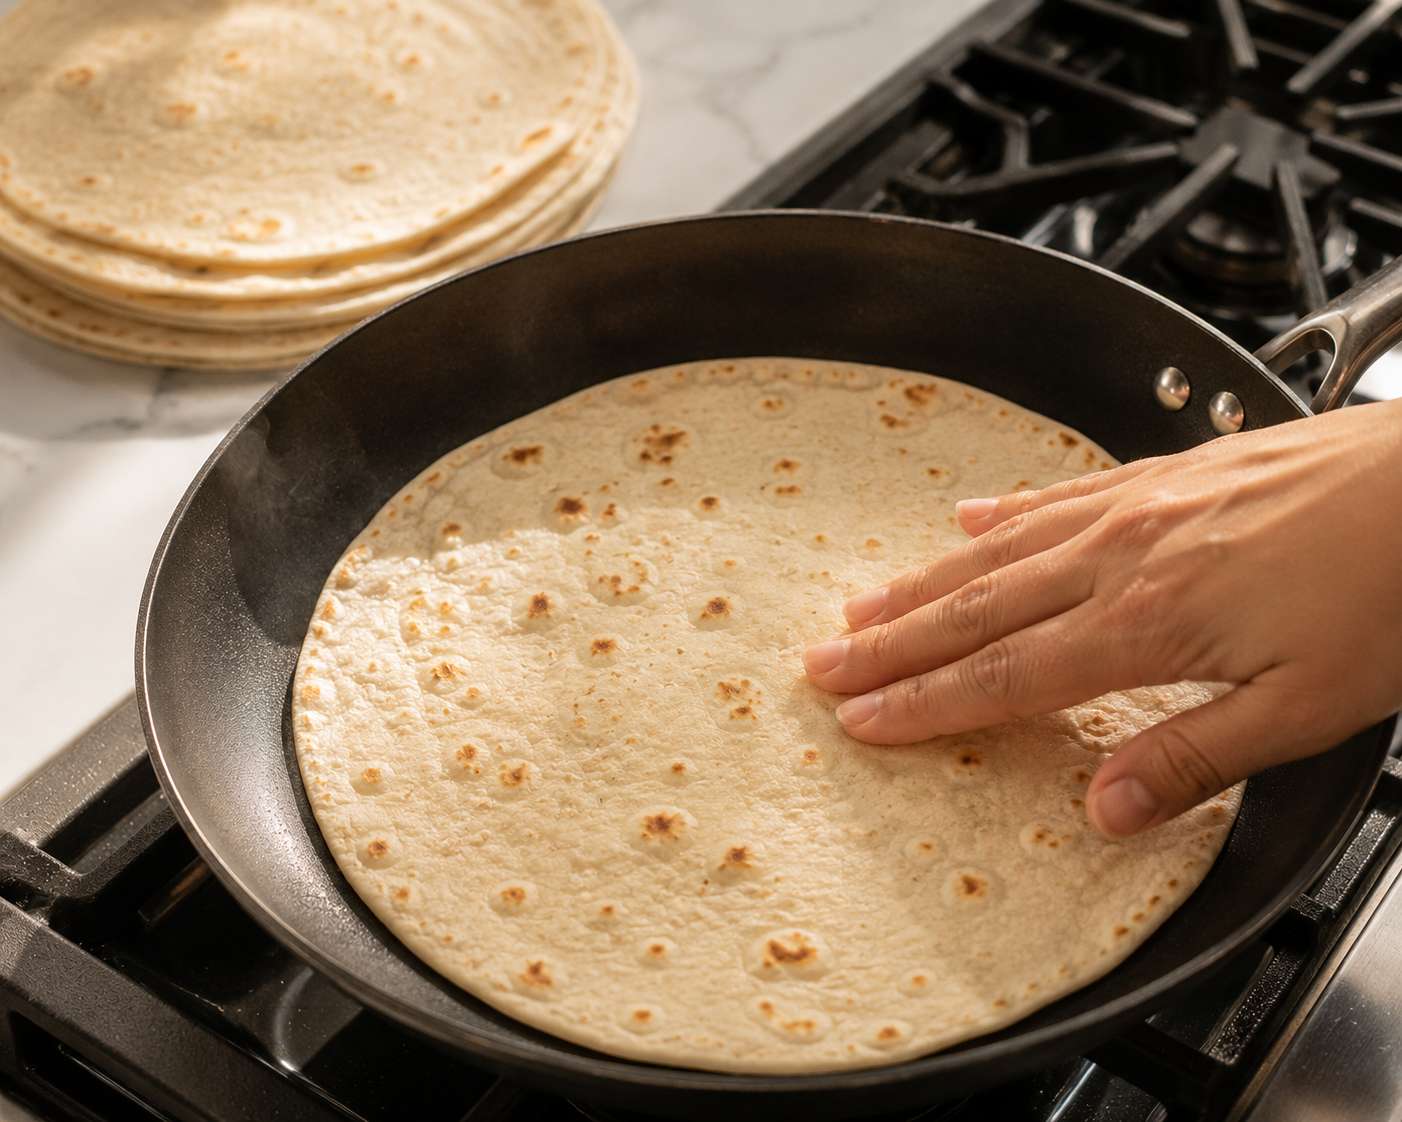
2Warm your tortillas. Heat each tortilla in a dry skillet for about 30 seconds per side — just until soft and pliable. This makes rolling them so much easier and stops them from cracking.💡 Don’t skip warming the tortillas. Cold tortillas crack when you try to roll them, and warm ones seal so much better when you toast the roll-ups.
-
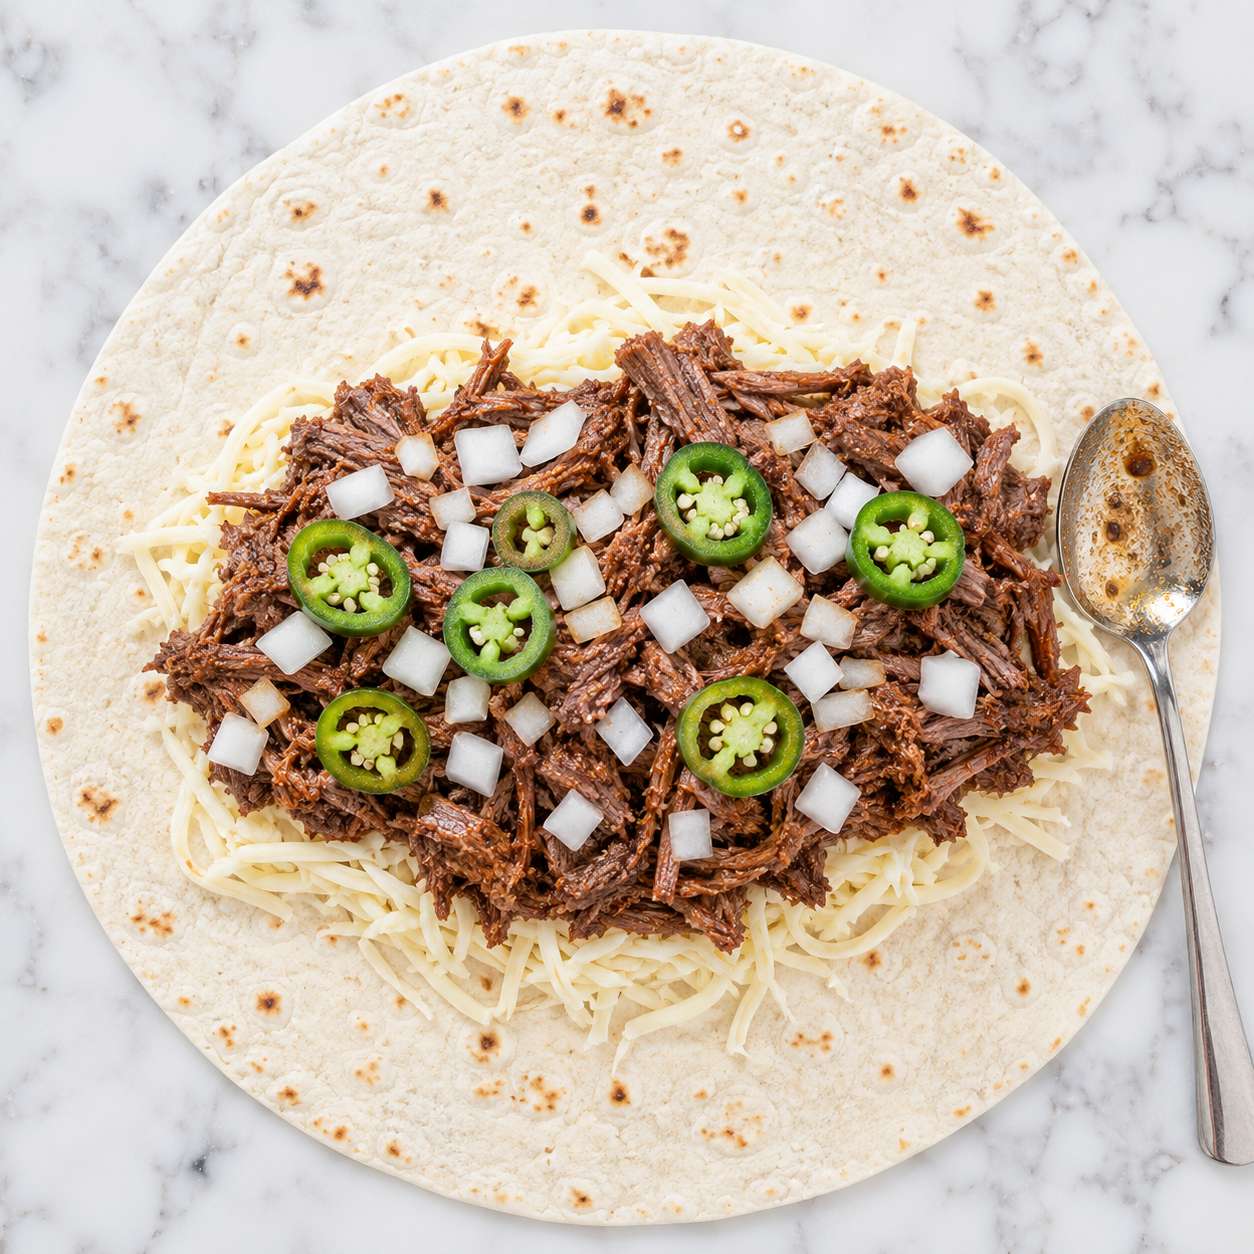
3Layer and fill. Lay a tortilla flat. Add a generous handful of cheese first — it melts and holds everything together — then a good scoop of shredded beef, some diced onion, and jalapeño if you like a little heat.
-
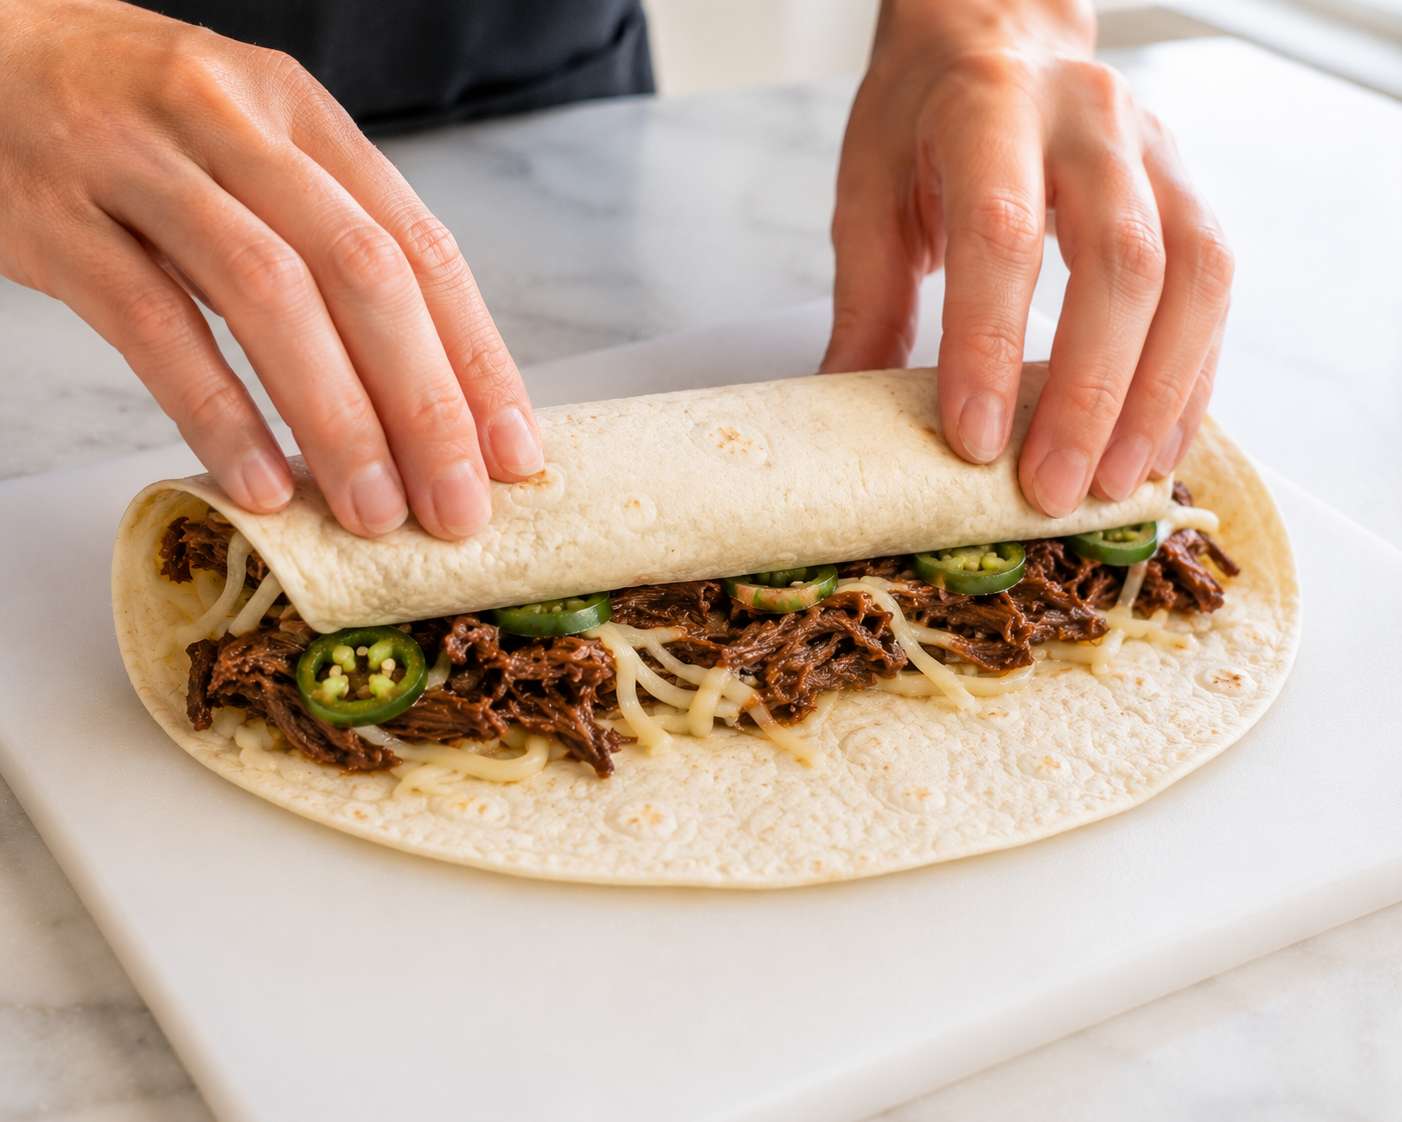
4Roll them up. Fold in the sides and roll tightly like a burrito. Press lightly to seal.
-
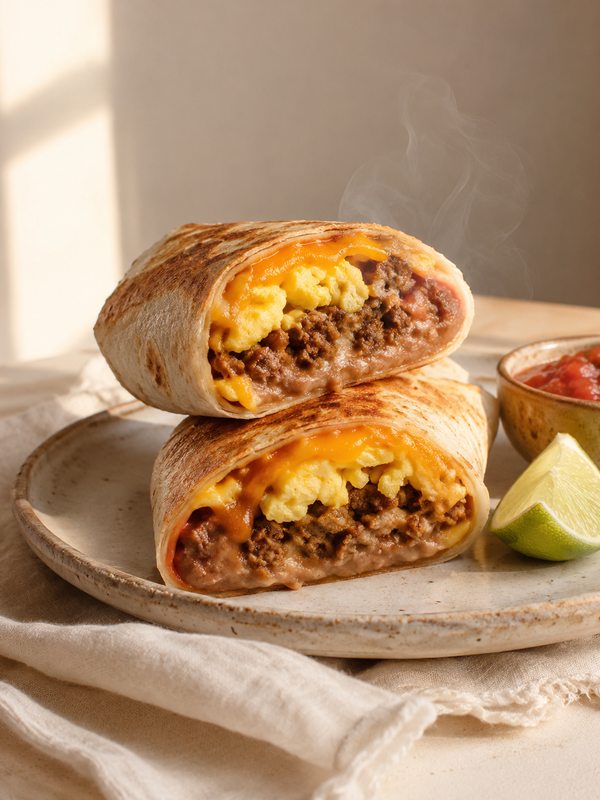
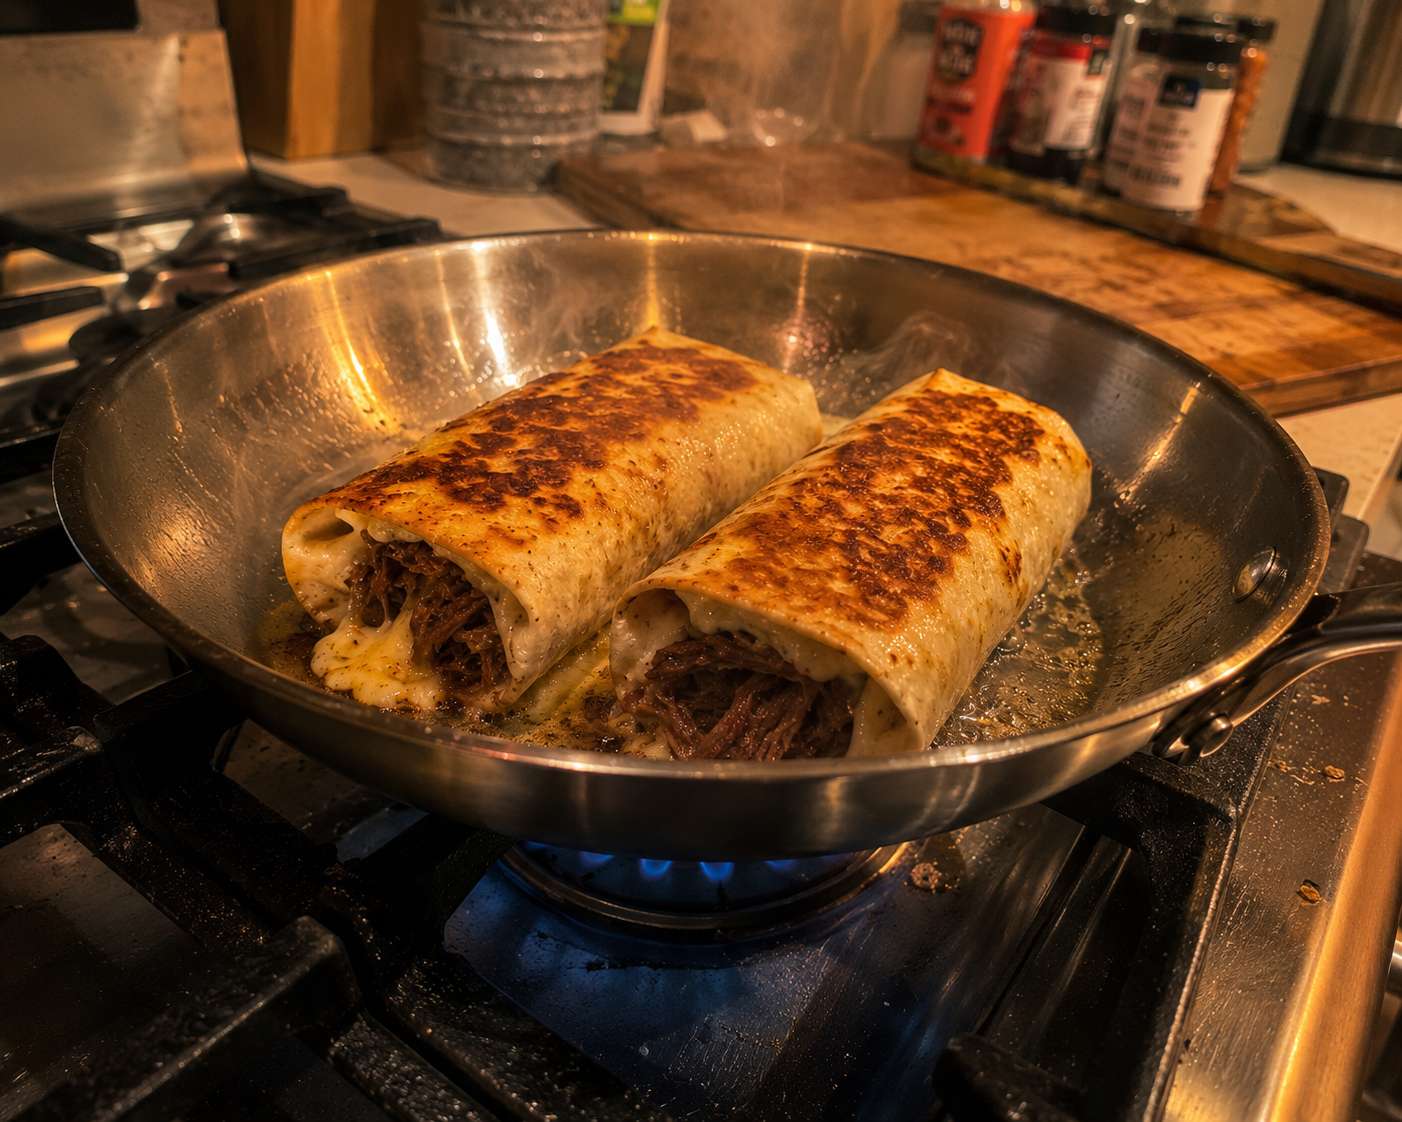
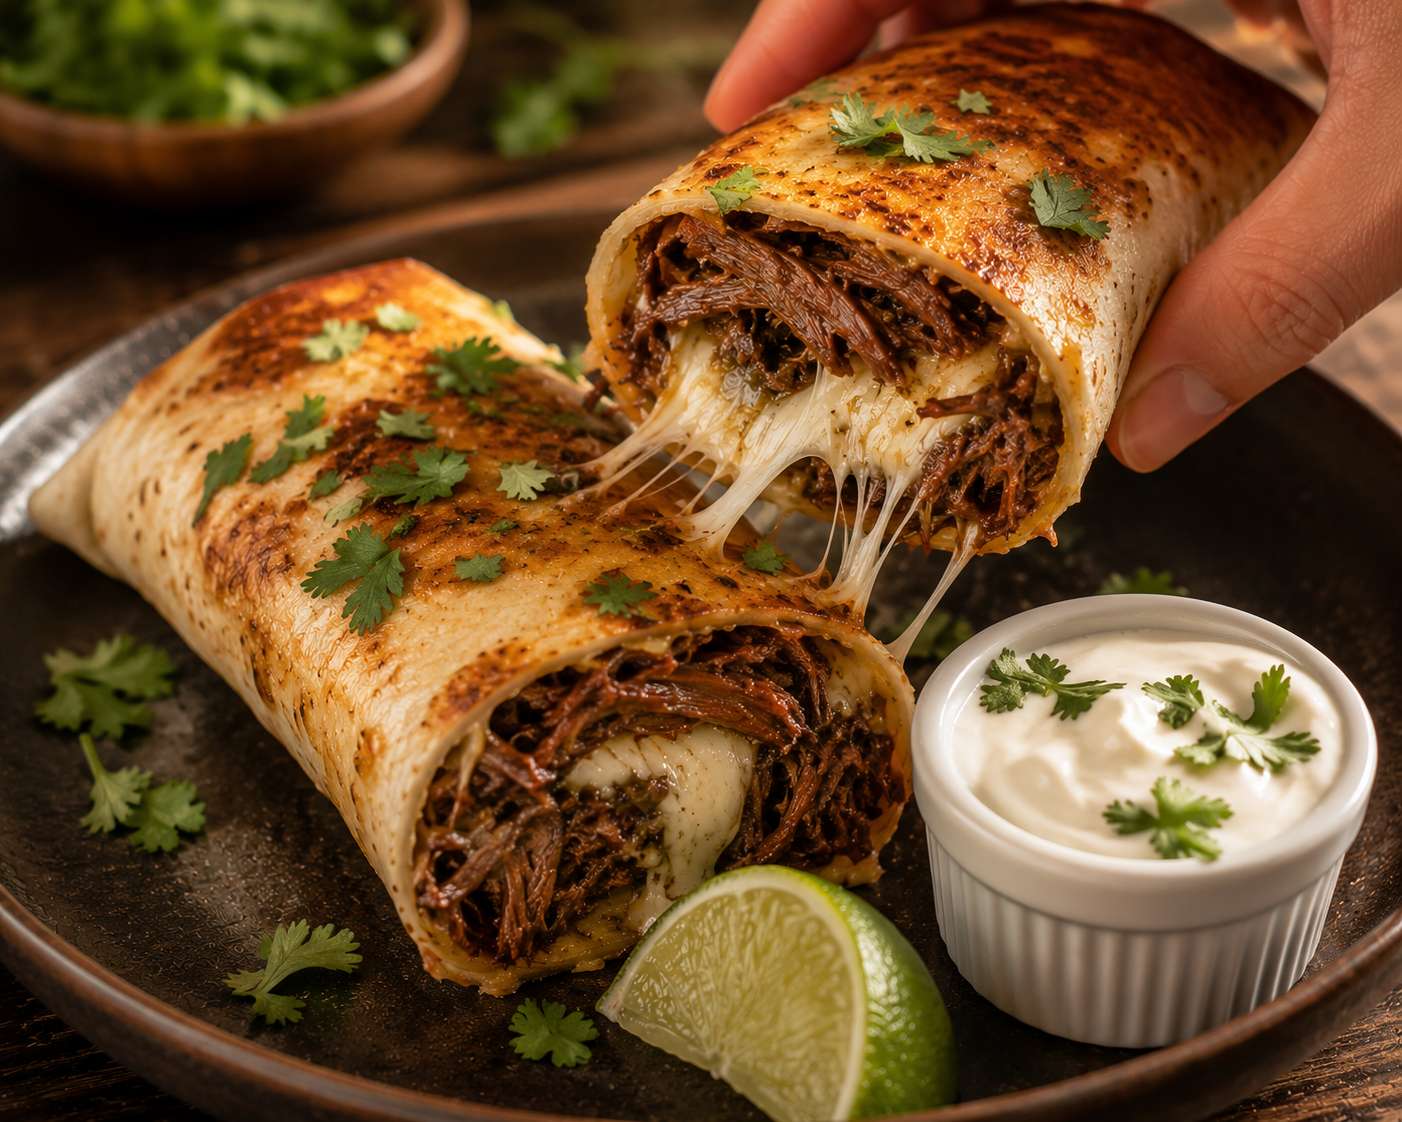
5Toast in the pan. Place the roll-up seam-side down in a warm skillet over medium heat. Toast for 2–3 minutes per side until golden and the cheese is melted through. You’ll hear that satisfying sizzle.💡 Don’t skip the toasting step. That crispy golden exterior with perfectly melted cheese inside is what makes these completely irresistible.
-
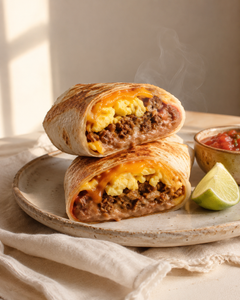
6Serve and enjoy. Slice in half, top with fresh cilantro, and serve with sour cream or salsa on the side. Done.

Private: Cheesy Shredded Beef Roll-Ups
🧄 Ingredients
- 450 ¾ g beef chuck or flank steak
- 1 ¾ tsp ground cumin
- 1 ¾ tsp smoked paprika
- 1 ¾ tsp garlic powder
- 1 ¾ tsp onion powder
- 1 ¾ tsp salt
- 1 ¾ tsp black pepper
- 1 ¾ tbsp olive oil
- 120 ¾ ml beef broth
- 4 ¾ large flour tortillas
- 150 ¾ g shredded Mexican cheese blend
- 1 ¾ white onion, diced
- 1 ¾ jalapeño, thinly sliced
- 2 ¾ tbsp fresh cilantro
- 4 ¾ tbsp sour cream
📋 Instructions
-
1
Season the beef with cumin, smoked paprika, garlic powder, onion powder, salt, and pepper on all sides.
💡 Let the beef sit with the spices for 5 minutes to absorb more flavor. -
2
Heat olive oil in a heavy skillet or pot over medium-high heat. Sear the beef for 3–4 minutes per side until browned.
💡 Don\\\'t move the beef while searing — let it develop a crust. -
3
Add the beef broth, reduce heat to low, cover, and simmer for 45–60 minutes until the beef is tender and easy to shred.
💡 Check halfway and add a splash more broth if it looks dry. -
4
Remove the beef from heat and shred using two forks. Set aside.
💡 Shred while still warm — it\\\'s much easier than when cooled. -
5
Warm each flour tortilla in a dry skillet over medium heat for 30 seconds per side until soft and pliable.
💡 Warm tortillas are easier to roll and won\\\'t crack. -
6
Lay a tortilla flat. Spread a generous layer of shredded cheese first, then add a scoop of shredded beef, diced onion, and jalapeño slices if using.
💡 Put cheese down first so it acts like glue when it melts. -
7
Fold in the sides of the tortilla and roll tightly from the bottom up, like a burrito. Press lightly to seal.
💡 Keep the filling toward the center to make rolling easier. -
8
Place the roll-up seam-side down in a warm skillet over medium heat. Toast for 2–3 minutes per side until golden and crispy.
💡 Press gently with a spatula for an even golden crust. -
9
Slice in half, top with fresh cilantro, and serve with sour cream or salsa on the side.
Nutrition Per Serving
💡 Pro Tips
- Don’t skip the toasting step. That crispy exterior with melted cheese inside is what makes these so good — it takes two minutes and transforms everything.
- Warm tortillas before filling. Cold tortillas crack when you roll them. Thirty seconds in a dry skillet makes all the difference.
- Use a blend of cheeses. Monterey Jack for that beautiful melt, sharp cheddar for flavor — together they’re perfect.
- Season your beef well. The spices are what give this a real Mexican breakfast feel — don’t be shy with them.
- Make the beef ahead. It keeps in the fridge for 4 days, so you can assemble roll-ups in under 10 minutes any morning.
Variations to Try
Add chipotle peppers in adobo sauce to the beef while it cooks, and use pepper jack cheese instead of regular. Bold, smoky heat that builds with every bite.
Use lean ground beef instead of chuck, skip or reduce the cheese, and add fresh pico de gallo and avocado slices inside. Just as satisfying, a lot lighter.
Use store-bought shredded rotisserie chicken or canned seasoned beef. Season yourself with the spice mix and it works just as well — dinner on the table in 15 minutes flat.
Add a scrambled egg inside the roll-up before toasting. It becomes a complete Mexican breakfast in one wrap — protein-packed and totally satisfying.
Serving Ideas
- Serve with a side of salsa verde or classic red salsa for dipping
- Add a simple avocado mash or guacamole on the side
- Pair with a fried egg if serving for breakfast
- Cut into smaller pinwheel pieces for a party snack or appetizer
- Pair with a cold agua fresca or Mexican hot chocolate for a full breakfast moment
Storage & Reheating
| Where | How long | Notes |
|---|---|---|
| ❄️ Fridge | Up to 3 days | Assembled but untoasted, wrapped in foil or airtight container — toast fresh when ready to eat |
| 🧊 Freezer | Up to 1 month | Wrap each individually in foil then zip-lock bag — thaw overnight in fridge before reheating |
| 🔥 Reheat | 3–4 min per side | Dry skillet over medium heat to get the crispy exterior back — microwave works but loses the crunch |
Frequently Asked Questions
Honestly, this is one of those recipes I go back to again and again. It’s the kind of thing that feels like a little treat without being complicated. Whether you’re making it for a slow Sunday breakfast or throwing it together for a quick weeknight dinner, it just works.
If you try it, I’d love to know how it turned out. Leave a comment or tag me — it genuinely makes my day when I see someone actually making these in their kitchen. Happy cooking. 🤍

Get new recipes in your inbox 🍋
No spam — just the good stuff, straight to you.