The Best Picnic Sandwich — Pressed Italian That Actually Travels
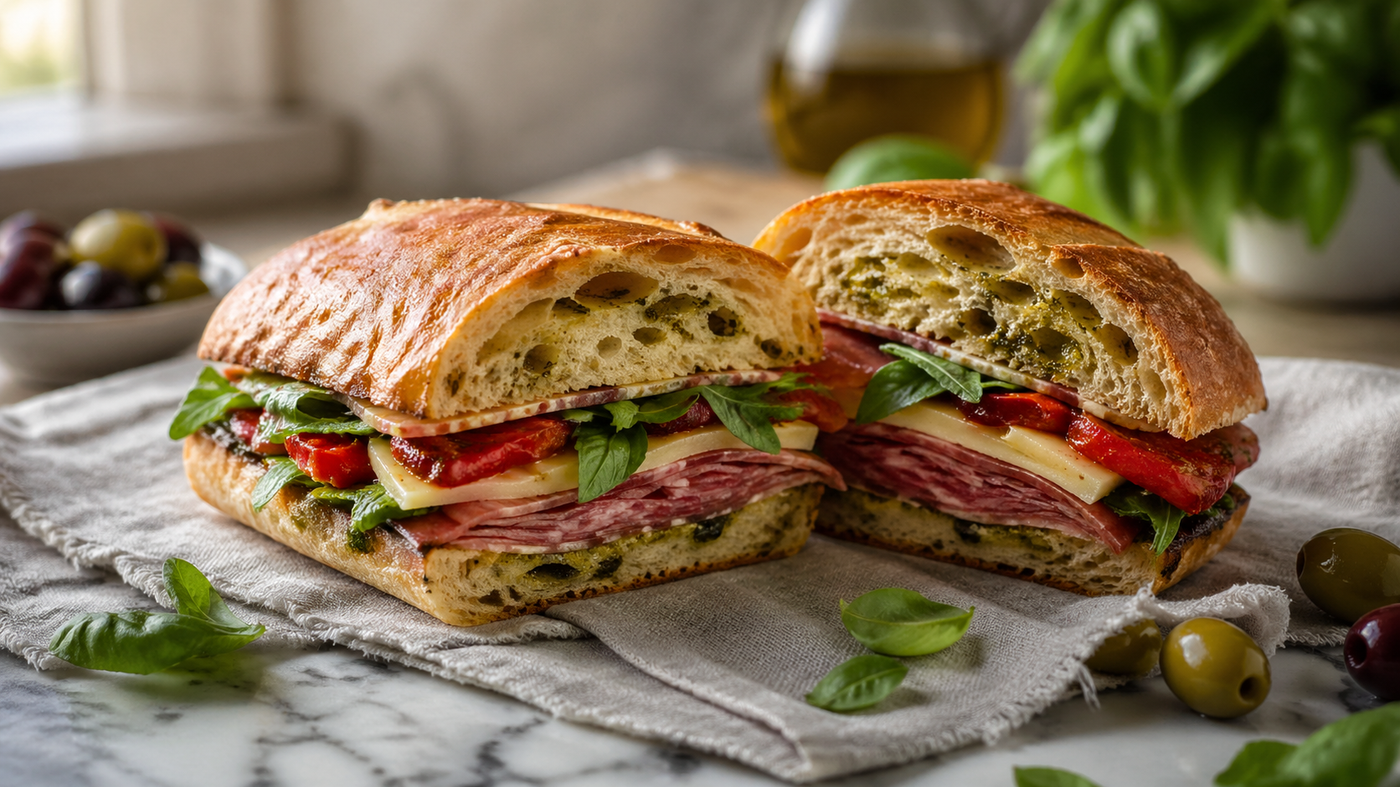
Layers of savory cured meats, sharp provolone, roasted red peppers, fresh basil, and a herby olive oil spread — pressed overnight into something compact, beautiful, and genuinely unforgettable.
There’s something about packing a really good sandwich that just makes a picnic feel complete. Not a sad, soggy, thrown-together situation — but an actual beautiful, layered, press-it-overnight kind of sandwich that holds up perfectly and tastes even better outdoors.
This pressed Italian picnic sandwich is honestly one of my favorite things to make when we’re heading out somewhere. A blanket in the park, a beach day, a lazy afternoon in the backyard — this sandwich fits all of it. It’s got layers of savory cured meats, sharp provolone, roasted red peppers, fresh basil, and a quick herby olive oil spread that soaks just enough into the bread to make every bite taste like something from a little Italian deli.
The trick is pressing it. You make it the night before, wrap it tight, and put something heavy on top. What you get is a compact, perfectly layered sandwich that slices cleanly and doesn’t fall apart in your hands. It’s the kind of thing that makes people at the park turn and ask “wait, what is that?” No cooking involved. Just assembly, a good wrap job, and a little patience.
Why You’ll Love This Recipe
- Zero cooking required — pure assembly, start to finish
- The pressing process makes it incredibly compact and sliceable — no messy unraveling
- Flavors develop overnight — it genuinely tastes better the next day
- Works for everything: picnic dates, family outings, beach days, lunchboxes
- Easily customizable for different diets and preferences
- Travels beautifully — no reheating, no mess, no containers needed
- Looks stunning when sliced — gorgeous layers that are very Pinterest-worthy
- Budget-friendly when you buy deli meats in moderate quantities
Step-by-Step Instructions
-
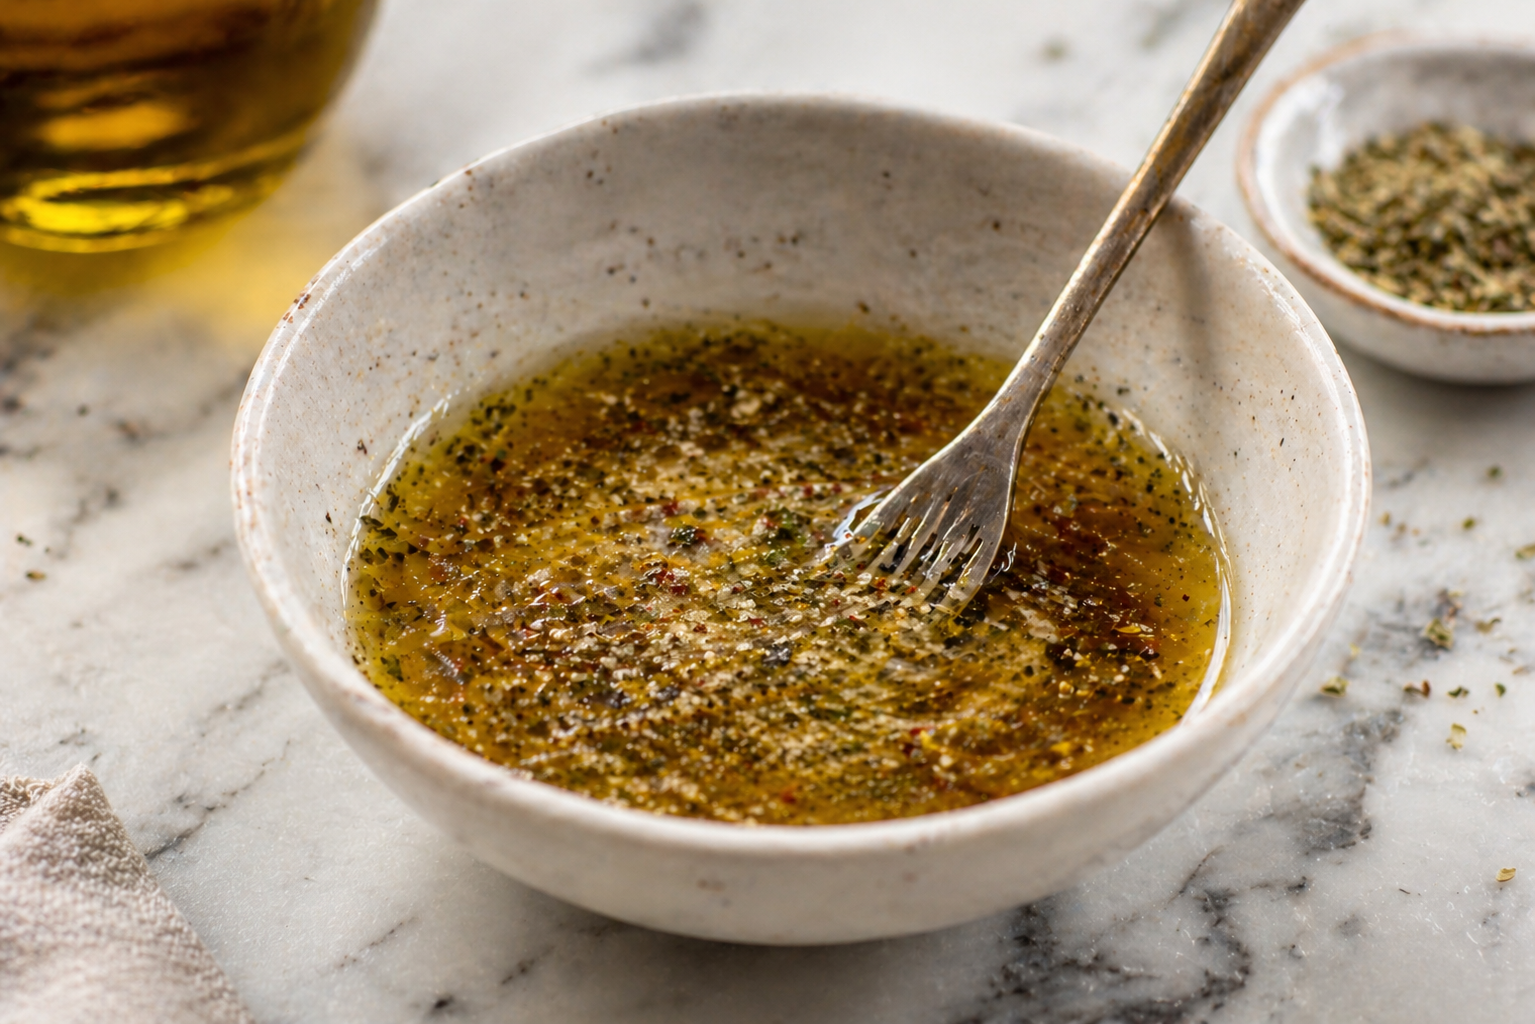
1Make the herby oil. In a small bowl, whisk together the olive oil, red wine vinegar, oregano, garlic powder, salt, and pepper. Set aside.
-
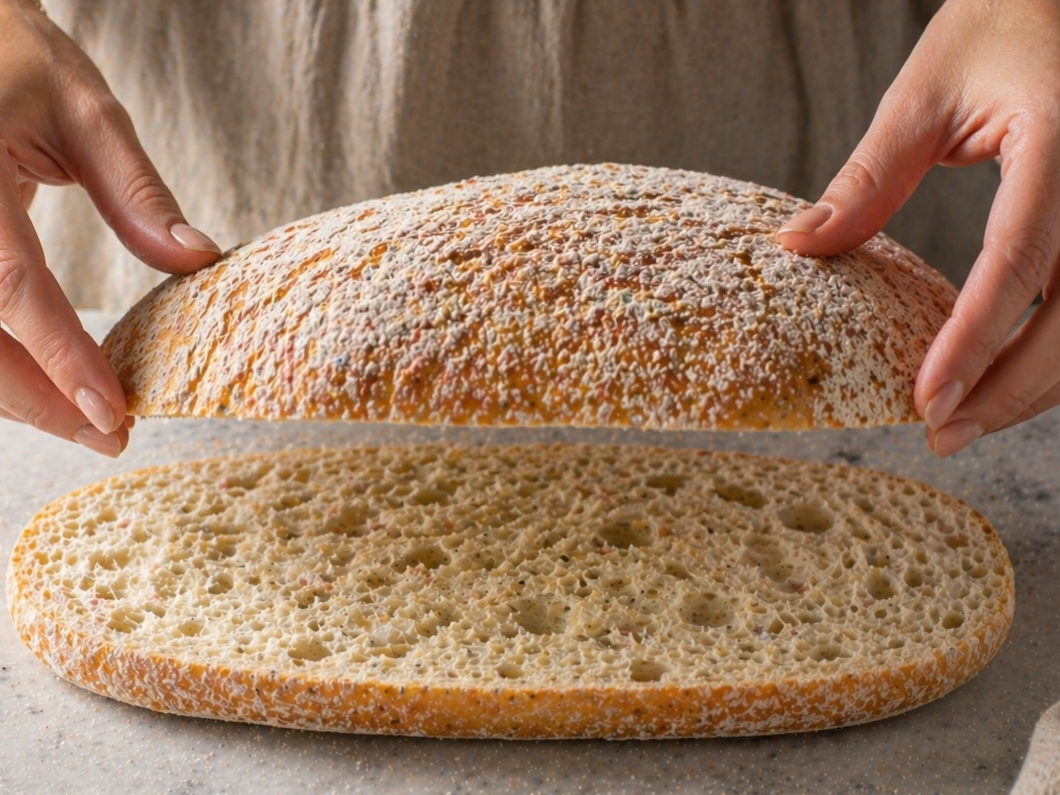
2Slice the bread. Cut your ciabatta loaf horizontally through the middle to get a top and bottom half. If the bread is very thick and doughy inside, scoop out a little of the soft interior to make room for the fillings without it being too bready.
-
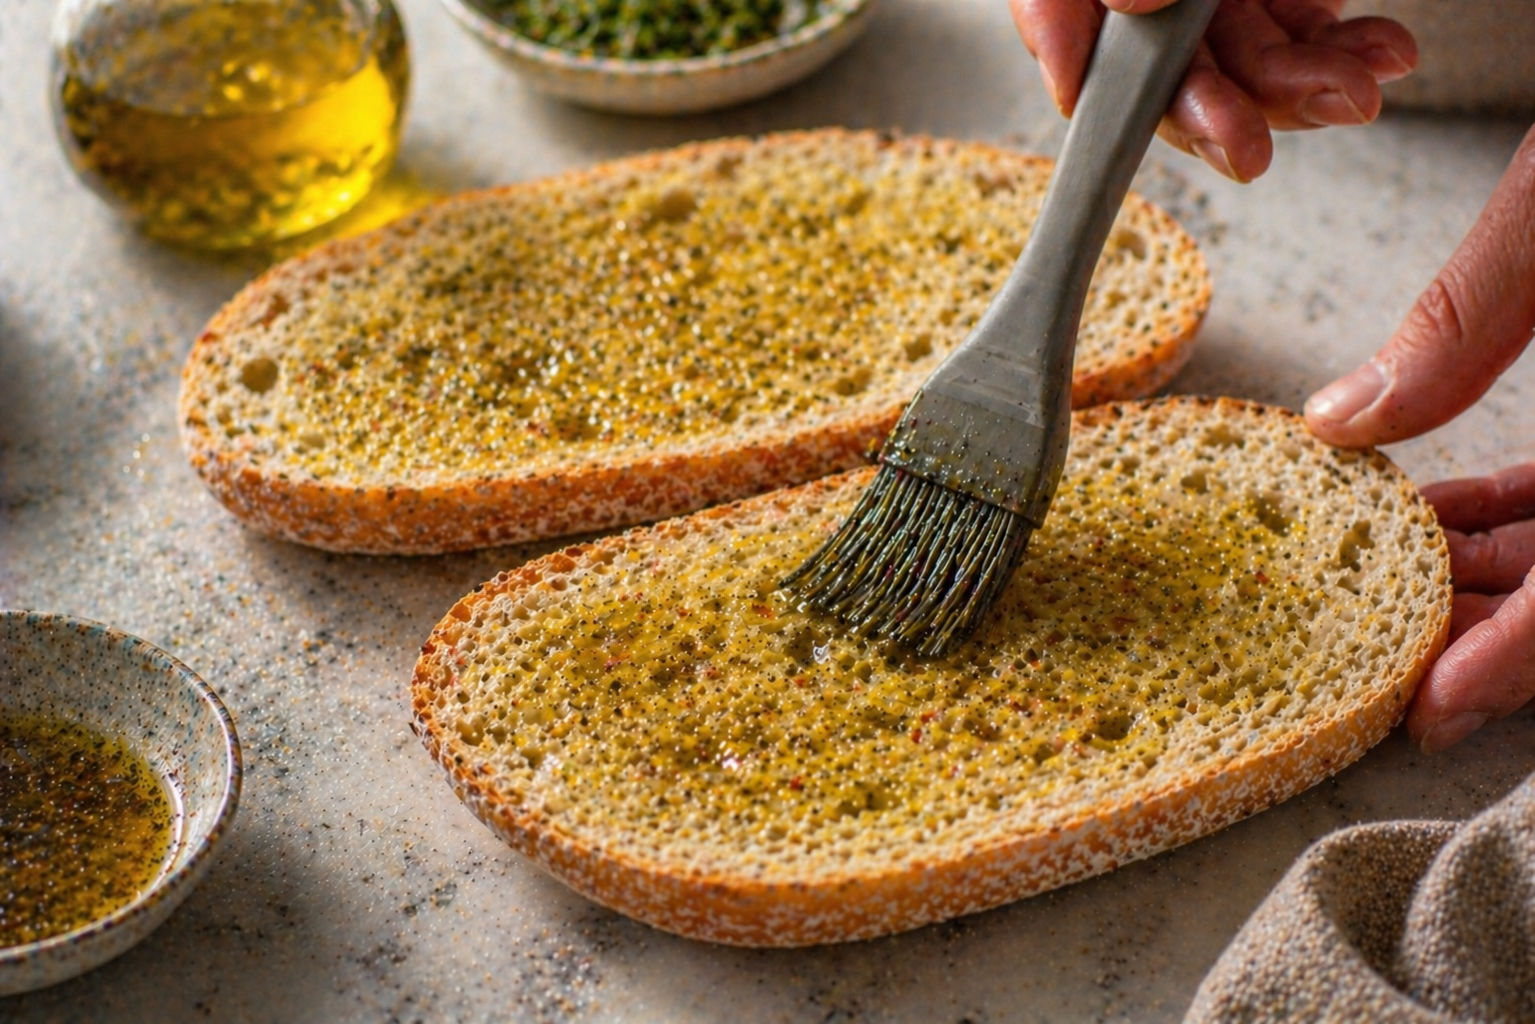
3Brush both cut sides with the herby oil. Be generous — this is where the flavor lives. Let it soak in for a minute or two before layering.💡 Layer cheese next to the bread on both sides — it acts like a moisture barrier and keeps the bread from getting soggy from the fillings in the middle.
-
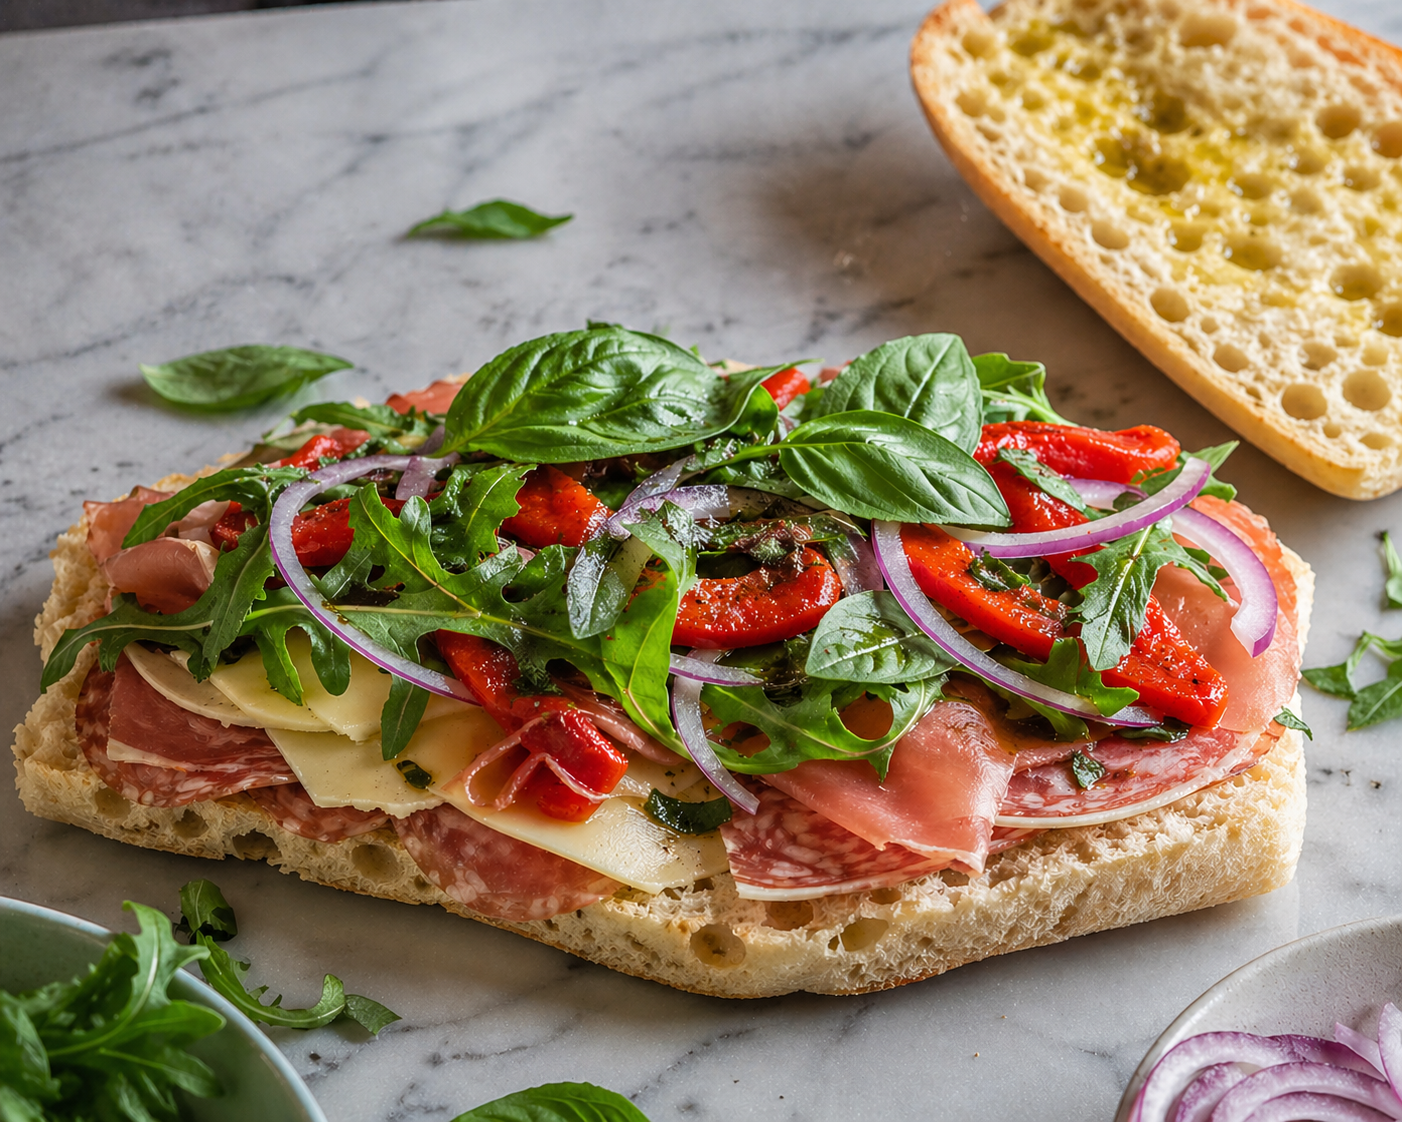
4Start layering on the bottom half. Begin with arugula as a base, then layer the salami, ham (or prosciutto), provolone, roasted red peppers, olives, red onion, and finally the fresh basil leaves. Layer evenly so every slice gets a bit of everything.
-
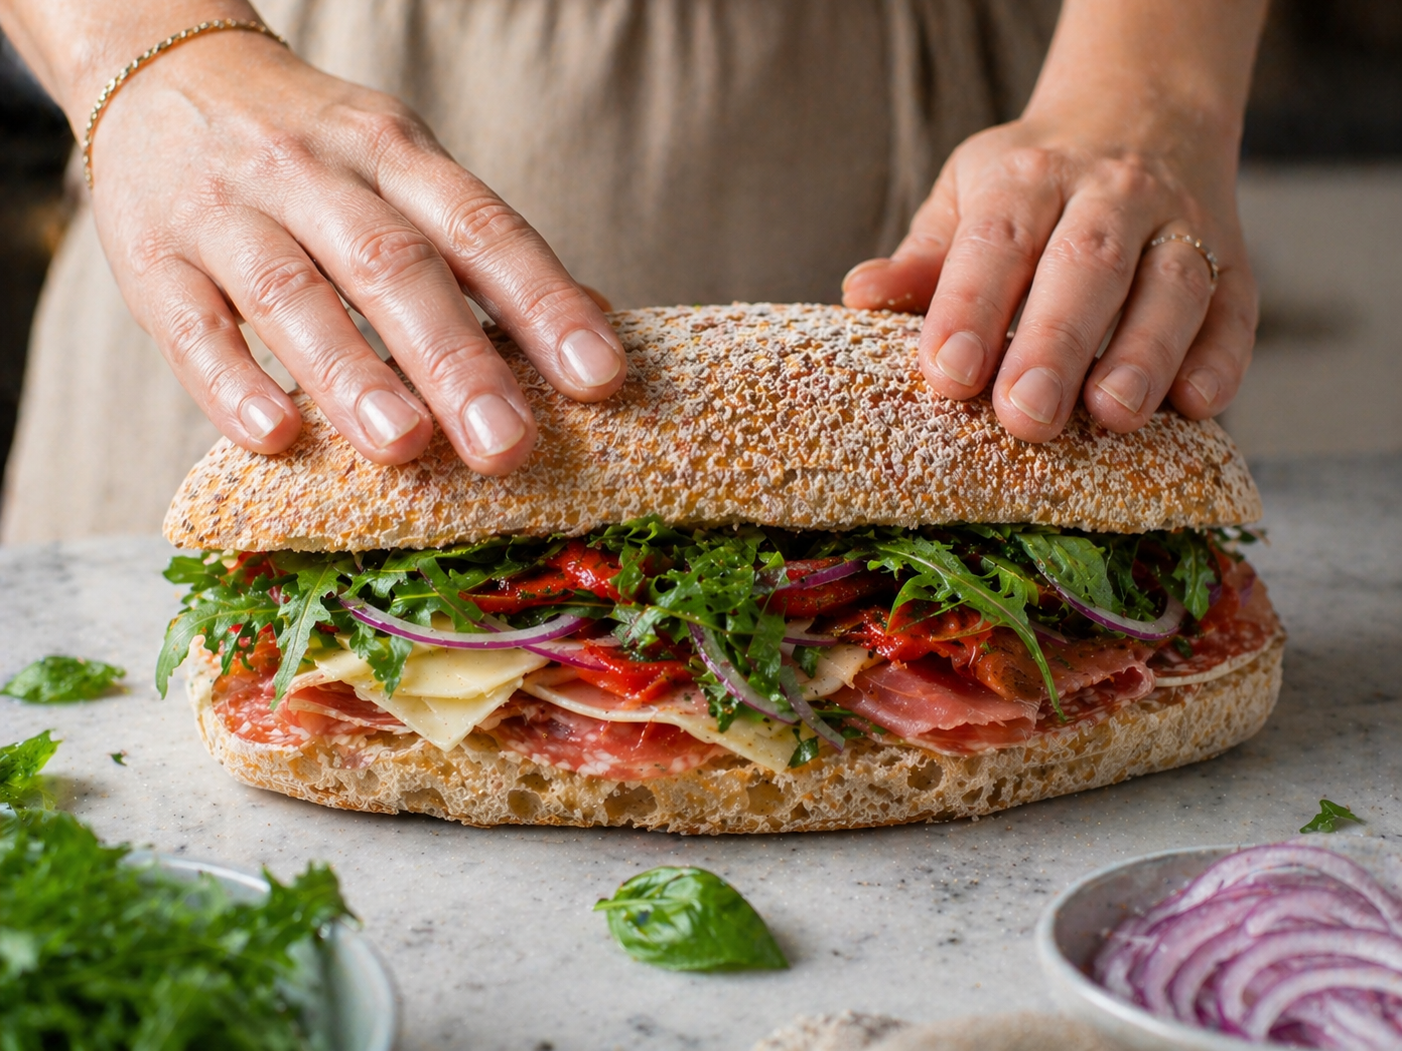
5Place the top half of the bread on. Press it down gently with your hands to start compacting the layers.
-
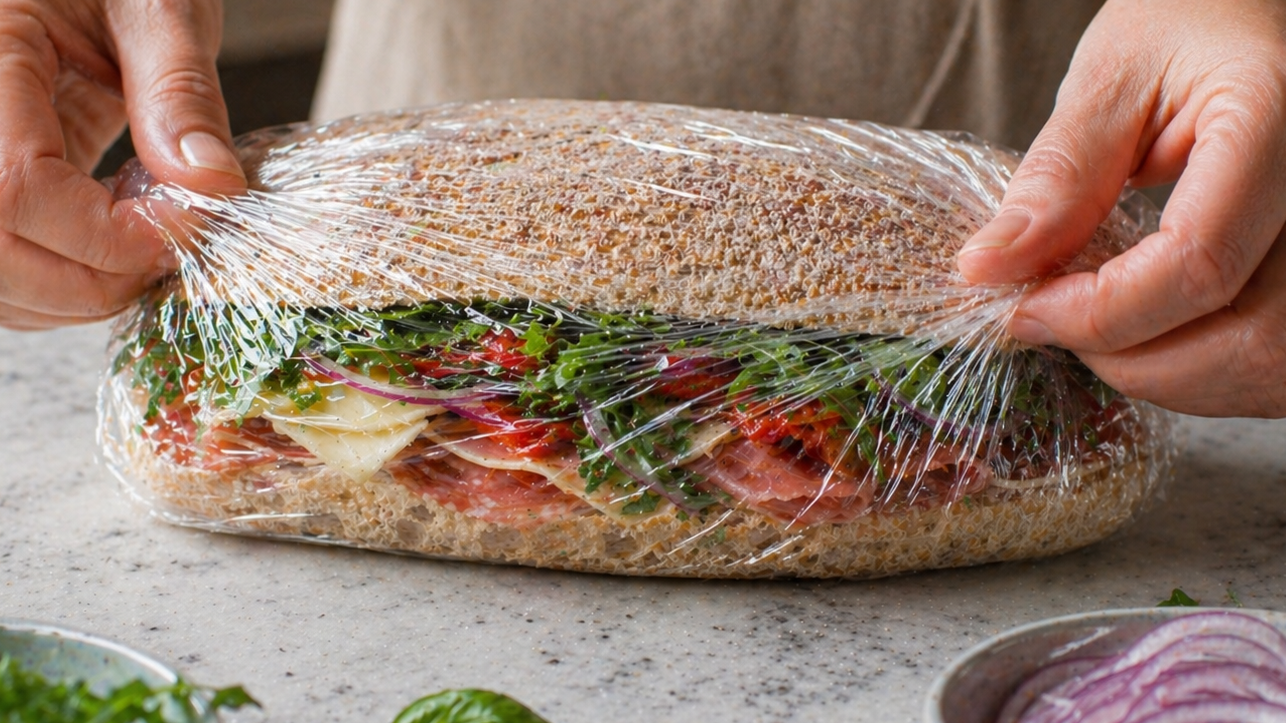
6Wrap tightly. Wrap the whole sandwich as firmly as you can in plastic wrap — two or three layers. Then wrap again in foil for extra stability.
-
7Press it. Place the wrapped sandwich on a flat surface, set a heavy pan or cutting board on top, and then stack something heavy — a cast iron skillet works perfectly. Press at room temperature for 30 minutes, then transfer to the fridge with the weight still on top for at least 2 hours, ideally overnight.⚠️ Don’t skip the pressing — even 2 hours makes a massive difference. The sandwich compacts, the flavors meld, and it slices so cleanly. Overnight is ideal.

-
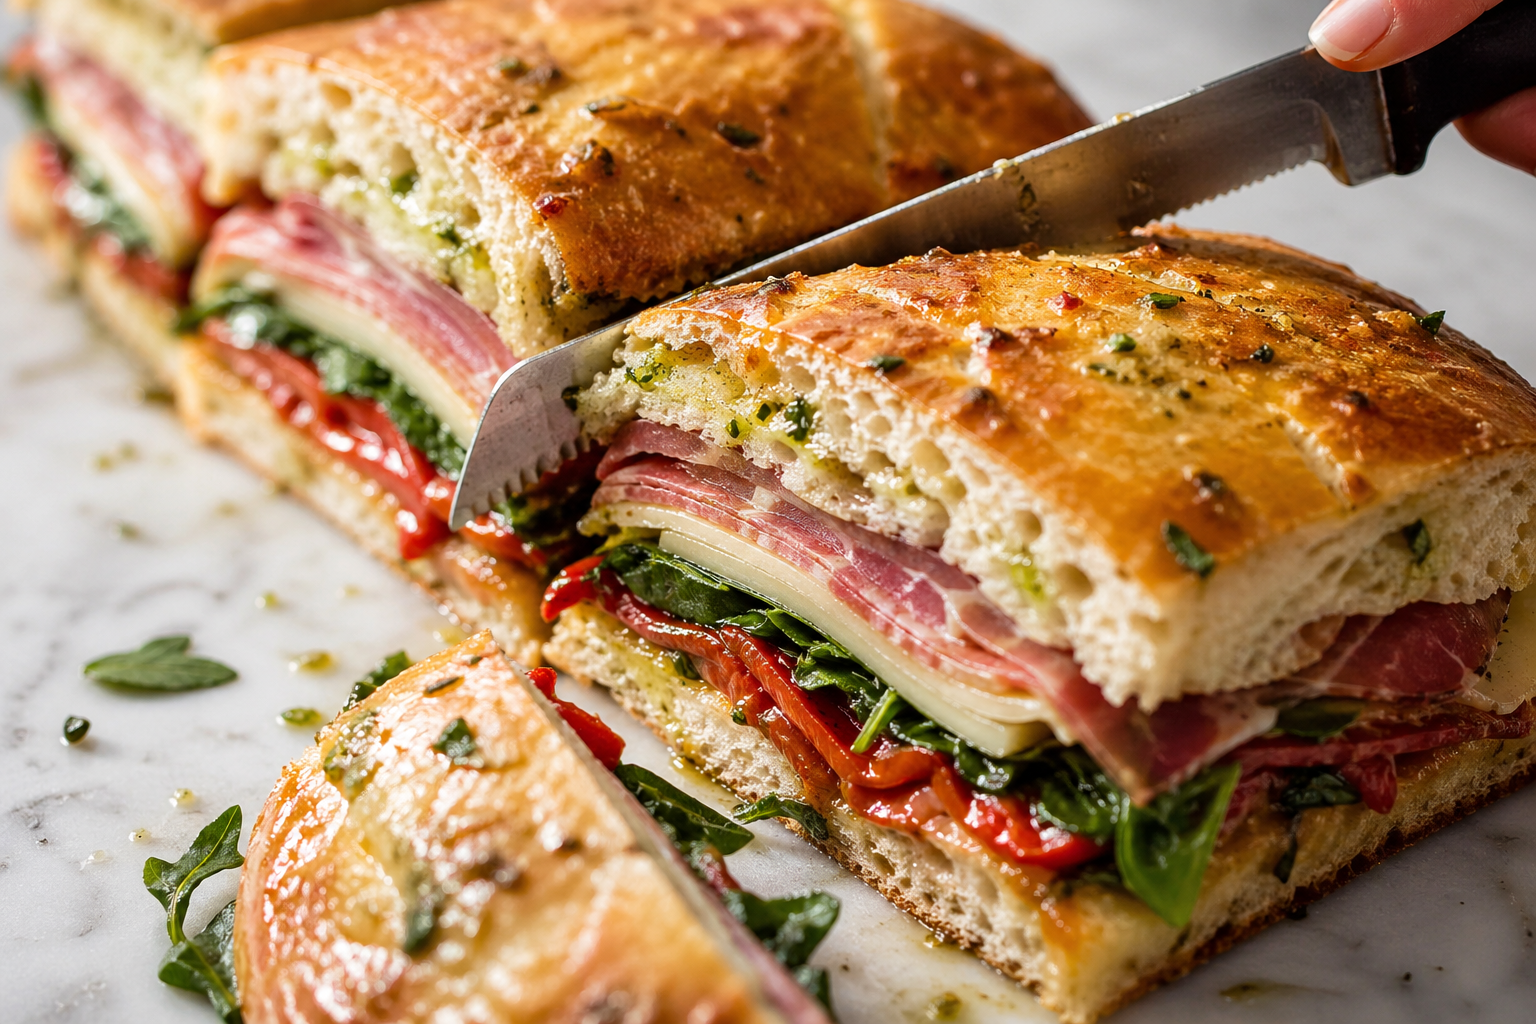
8Slice and serve. When you’re ready to go, unwrap and slice into individual portions with a sharp serrated knife. Rewrap slices individually or keep as a whole loaf in your picnic basket.
The Best Picnic Sandwich Recipe — Pressed Italian That Actually Travels Beautifully
🧄 Ingredients
- 1 ¾ Large ciabatta loaf
- 8 ¾ Salami or soppressata, thinly sliced
- 8 ¾ Thinly sliced ham or prosciutto
- 8 ¾ Provolone cheese, sliced
- 1 ¾ cup Roasted red peppers (jarred), drained
- 1 ¾ cup Fresh basil leaves
- 1 ¾ cup Baby arugula or spinach
- 1 ¾ cup Sliced black or green olives
- 3 ¾ Red onion, thinly sliced
- 3 ¾ tbsp Olive oil
- 1 ¾ tbsp Red wine vinegar
- 1 ¾ tsp Dried oregano
- 1 ¾ tsp Garlic powder
- 1 ¾ pinch Salt and black pepper
📋 Instructions
-
1
In a small bowl, whisk together the olive oil, red wine vinegar, dried oregano, garlic powder, salt, and black pepper to make the herby oil. Set aside.
💡 Taste it — it should be punchy and flavorful since it seasons the whole sandwich. -
2
Slice the ciabatta loaf horizontally to create a top and bottom half. If the bread is very thick inside, scoop out a small amount of the soft interior to make room for the fillings.
💡 A serrated bread knife gives the cleanest cut. -
3
Brush both cut sides of the bread generously with the herby oil. Let it soak in for 1 to 2 minutes before adding fillings.
💡 Don\'t rush this step — the oil soaking into the bread is where most of the flavor comes from. -
4
Layer the fillings on the bottom half in this order: arugula first, then salami, ham, provolone, roasted red peppers, olives, red onion, and basil leaves on top.
💡 Place cheese slices directly against the bread on both sides to act as a moisture barrier. -
5
Place the top half of the bread on and press down firmly with both hands.
-
6
Wrap the entire sandwich tightly in 2 to 3 layers of plastic wrap, then wrap again in foil for extra stability.
💡 The tighter the wrap, the better the press. -
7
Place the wrapped sandwich on a flat surface and set a heavy pan or cutting board on top. Add extra weight — a cast iron skillet works perfectly. Let it press at room temperature for 30 minutes, then refrigerate with the weight on top for at least 2 hours, ideally overnight.
💡 Overnight pressing gives the best flavor and the cleanest slices. -
8
When ready to serve, unwrap the sandwich and slice into 4 equal portions using a sharp serrated knife. Rewrap individual slices in parchment for easy transport.
💡 Slice with one firm motion — don\'t saw back and forth or the layers will shift.
Nutrition Per Serving
💡 Pro Tips
- Pat the roasted peppers really dry. This is the number one thing that prevents soggy sandwiches. Spend 30 seconds pressing them between paper towels.
- Layer cheese next to the bread on both sides — it acts like a moisture barrier and keeps the bread from getting soggy from the fillings in the middle.
- Don’t skip the pressing. Even 2 hours makes a massive difference. The sandwich compacts, the flavors meld, and it slices so cleanly. Overnight is ideal.
- Ciabatta is the best bread for this. It has a sturdy crust that holds up to pressing and soaks in the oil without falling apart. Sourdough boule is a close second.
- Slice right before serving if you can — or wrap slices individually so they stay neat in the basket.
- Bring the serrated knife with you if you’re slicing at the picnic spot. Much cleaner than pre-slicing hours ahead.
Variations to Try
Add hot sopressata or pepperoni, pickled jalapeños, and a drizzle of chili oil to the olive oil mixture. Bold, a little fiery, and absolutely addictive.
Swap cured meats for grilled chicken or turkey, use fresh mozzarella, skip the olives, and pile on extra greens and cucumber. Still pressed, still beautiful.
Double the roasted red peppers, add marinated artichoke hearts and sliced tomato, and spread hummus on the bottom half instead of just olive oil. Hearty and gorgeous.
Use small ciabatta rolls or slider buns. Make individual pressed minis — perfect for picnics with kids or a larger group. Press in a zip bag with a heavy pan for 1 hour.
Serving Ideas
- Slice into thick portions and arrange on a wooden board at your picnic spot for a beautiful spread
- Pair with a simple pasta salad, chips, or fresh fruit for a complete summer lunch
- A cold sparkling water with lemon or lemonade pairs perfectly — light against the rich, savory sandwich
- Bring cornichons, olives, and a little wedge of cheese on the side for a full picnic charcuterie spread
- For a picnic date setup: individual slices wrapped in parchment and tied with twine look absolutely adorable
Storage & Make-Ahead
| Where | How long | Notes |
|---|---|---|
| 📦 Make-ahead | Up to 24 hrs | Assemble and press in the fridge — it only gets better |
| ❄️ Fridge | Up to 2 days | Fully wrapped and pressed — after 2 days the bread softens too much |
| 🧊 Freezer | Not recommended | Fresh vegetables and bread texture don’t hold up after freezing |
| 🧺 At the picnic | 2–3 hours | Keep in a cool bag with ice pack — especially on hot days |
Frequently Asked Questions
This pressed Italian picnic sandwich is one of those recipes that looks like you put in way more effort than you actually did — and I am fully here for that. A little assembly the night before, some good ingredients, and you’ve got something genuinely beautiful and delicious waiting for you in the fridge.
Pack it up, find a good spot, and enjoy every single bite. These are the kinds of simple food moments that stick with you. Give it a try this weekend and let me know how it goes — I’d love to see your picnic setups in the comments! 🌿

Get new recipes in your inbox 🍋
No spam — just the good stuff, straight to you.